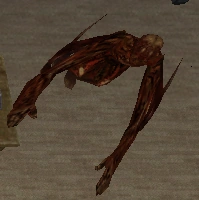
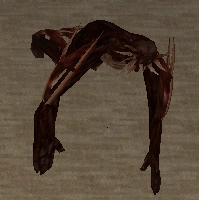
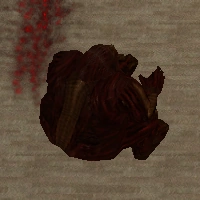
Dead Frontier Wiki
Advertisement
"DescriptionRP" The item/enemy descriptions on this page are strictly meant for role-playing purposes.


When you first venture into the city, zombies appear infrequently and are easy to kill. As you move deeper into the city, however, progressively tougher zombies will appear, easily identifiable by their color and unique, mutated body types. The health points of all infected stated here is only at the best accuracy from the actual health value.

There are also several factors, like all kinds of movement (note that movement attracts individual infected) and fighting noise, that will increase "Aggro" (Aggression), or more exactly, the number of zombies that will spawn nearby, up to eight at once in 2D version, and about 20-30 in 3D, and their moving speed.

Due to various special mechanics surrounding them, Bosses have been moved to their own page.

Important Notes[]

  • Your experience (EXP) gain is multiplied by 150%. while you're Nourished, 120% when you're Fine, only 90% while you're Hungry, and only 60% while you're Starving.
  • You can find the player movement values to compare to zombie movement values on the page here.
  • Experience per single attack is based on damage dealt, and there is no reward for dealing overkill EXP:
    • For example: If you deal 20% of a zombies health, you will immediately gain 20% of that zombie's EXP. If a zombie has 10% HP and the killing blow does 20% damage, you will gain 10% of the zombie's EXP.
    • The EXP to HP ratio of a zombie (from now on referred to as EXP Density) stands as a rough indication of how quickly you can earn EXP when level up. If you deal damage to a zombie with a higher EXP Density, regardless of whether or not you can kill it, you will always gain XP more quickly.
    • All XP bits gained are then rounded to 2 decimal precisions. This can cause minor rounding issues with EXP gain.
    • This also happens in multiplayer, meaning that if a player does the majority of the damage they get a majority of the experience. As with players, the share of EXP the guards receive is proportional to the amount of damage they dealt to a zombie before it was killed.
    • Players looking to rack up lots of EXP should keep this in mind when grinding through an Outpost Attack-- relying too much on the guards for support fire (or grinding a horde within their attacking range) can significantly cut down your EXP gain.

Stages of Zombie Behavior[]

The zombie behavior stages are as follows:

Calm -> Disturbed -> Enraged
  • Calm state is the state wherein the zombies are walking very slowly and not paying any attention to trespassing survivors. They proceed at their slowest speed and commonly walk in a circle.
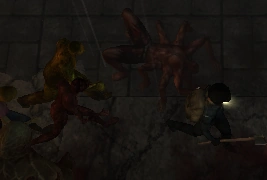
    Burnedzombie chase

    A few zombies on an Enraged state chasing a player.

  • Disturbed state causes the zombie to slowly walk towards the player. Speed is slightly higher than Calm, but lower than Enraged.
  • Enraged state is the state wherein the zombies are angered and sprints toward the players. They proceed to move on their fastest speed.
  • Fleeing state is when a zombie is fleeing from the player temporarily because its path is blocked but will, in a matter of seconds, redirect its attention back to the player. Normally the zombie will run backwards in a diagonal line to try to better its position.

Several events can cause the zombie to advance in the behavior charts:

  • A Calm zombie becomes Disturbed if they manage to get a direct line-of-sight on a player.
  • Hurting the zombie advances its behavior by 1 stage (It is thus possible to damage a Calm zombie and only makes it Disturbed)
  • A firearm "noise" event advances the zombie's behavior by 1 stage. Different firearm types have different chance of doing this, with Pistols/Rifles having the lowest and Shotguns/Explosives having the highest.
  • A Siren's scream instantly causes all nearby zombies to become Enraged.
  • Entering AFK mode or exiting the block causes zombies targeting you to become Calm, unless they can find another player as target, in which they will keep their current behavior. Exiting AFK mode does not affect zombie behavior.
  • All zombies spawned by aggro spikes are instantly Enraged.

NOTE: Certain zombies such as the Spiders, Giant Spiders and Bloats only goes through 3 phases: Calm, enraged, and fleeing. These zombies are instantaneously enraged when they notice the survivor.

Knockback and Stagger[]

Knockback[]

All zombies have a hidden "weight" stat that determines their susceptibility to knockback. Rule of thumb is: "fatter" zombies like Bloats and most bosses have higher weight and thus heavy resistance to knockback, while "thin" zombies like Long Arms have lower weight and thus can be knocked back easily even with pistols/rifles.

Stagger[]

Zombies can also be staggered if it receives a hit (or a combination of hits in case of shotguns/minigun) that deals at least 1/50 of its remaining HP, with effect increasing the lower its HP gets. This causes it to temporarily stop moving and become more susceptible to the effects of knockback, even from weapons that have yet to meet the stagger requirement.

  • Normal zombies and mini-bosses will get staggered for a significant amount of time, enough to get greatly pushed back by other players with high-KB weaponry. Most bosses will barely pause when staggered.
  • Staggering a zombie does not interrupt its attack; if you are in the attack range of a staggered zombie, you will get still get hit as usual.
  • Stagger condition is independent from knockback power; weapons with low knockback power but high DPH (such as bolt action Rifles) are able to stagger heavy target earlier than usual, but will not inflict knockback as well against weaker enemies.

Current Zombie Population[]

This is the second generation of zombies, which were introduced with the change to Unity3D as the primary game engine. Their "ancestors" are the 2D Zombies, which were totally replaced by the new 3D variants. The second generation both surpasses its predecessors both by in quantity and in lethality. The longer time the virus is allowed to remain in the host, the more likely the host will mutate and become more lethal.

The following summaries do not discount melee as an efficient form of combat against the undead. What is trying to be stressed is that long-ranged combat is usually the safest alternative, as the claws, blades, and teeth of the undead are not often able to reach the distance of a bullet. It is generally best to attack zombies in groups or to have a varied arsenal.

Normal Zombies[]

These Normal Zombies form the rank and file of the infected population. While the weakest of Normal Zombies may not be capable of doing anything other than a weak melee swipe that can easily be avoided, later forms of Normal Zombies may have special abilities that may pose credible challenges to the players, such as:

  • Long Arms: These enemies are gifted with unusually long arms, allowing them to strike from a further distance than normal.
  • Pukers: These enemies are capable of puking acid that reaches much further than Long Arms; this requires them to stand still for a long time however, and will make them vulnerable to being blindsided by melee attacks.
  • Dogs: While they may have shorter reach than normal, dogs are infamous for having incredibly high speed and damage; one or two of these can quickly overwhelm an exhausted survivor with just a few bites.
  • Exploders: These will explode violently when killed by any firearm, damaging anyone near them. Try to keep your distance, or use a melee weapon to deal with them instead.

Tier 1 - Basic ("Grey") Zombies[]

These are the most basic zombies available in the game, equivalent to the Grey zombie power level in the 2D era. They are most numerous in early-game zones like the Blue and Green zone, and barring very specific circumstances, gradually disappear in higher level zones.

Dog Zombie
Dog Zombie
HP Damage
Melee Vomit Explosion
20 10 - -
EXP Speed
Calm Disturbed Enraged
15 1.1 2.2 4.5
Density Zones
0.75 EXP/HP B / G / Y / O / R / DR


In the first weeks of the infection, N-4 infected dogs were common but seemed to have disappeared later on.
However, they re-appeared throughout Fairview, years later, for reasons unknown.
Their small body and fast speed make them difficult to hit.
If survivors can't fight back, they will need to have some Agility to outrun them or be mauled alive.

Notes:

Tactics/Strategies:
- Only rudimentary and common-sense tactics are required.

Female Zombie
Female Zombie
HP Damage
Melee Vomit Explosion
21 8 - -
EXP Speed
Calm Disturbed Enraged
15 0.8 2 4
Density Zones
0.714 EXP/HP B / G / Y / O / R / DR


Mothers, daughters, sisters, aunts, wives, and friends who lost their lives in the early stages of the zombie outbreak.
They retain no memories of their former lives and attack any and all humans - even ones with whom they shared their deepest connections with.
Survivors who recognize their loved ones have had trouble killing them.
Those that have said it is one of the darkest moments they have ever experienced.

Notes:

Tactics/Strategies:
- Only rudimentary and common-sense tactics are required.

Male Zombie
Male Zombie
HP Damage
Melee Vomit Explosion
25 10 - -
EXP Speed
Calm Disturbed Enraged
15 0.8 1.5 3.5
Density Zones
0.6 EXP/HP B / G / Y / O / R / DR


Fathers, sons, brothers, uncles, husbands, and friends who lost their lives in the early stages of the zombie outbreak.
Naturally having more mass than their female counterparts, these zombies are more immune to knock-back and have a higher constitution.

Notes:

Tactics/Strategies:
- Only rudimentary and common-sense tactics are required.

Fat Female Zombie
Fat Female Zombie
HP Damage
Melee Vomit Explosion
30 10 - -
EXP Speed
Calm Disturbed Enraged
21 0.6 1.5 2.8
Density Zones
0.7 EXP/HP B / G / Y / O / R / DR


Slightly weaker than the Fat Male Zombie.
Fat zombies are very resistant to knockback and weak hits such as a non-critical chainsaw or knife hit won't interrupt its attacks nor be able to stop them once they're coming for you.
They are even more ravenous in their un-lives.

Notes:
- A more durable female zombie but easier to target.

Tactics/Strategies:
- Only rudimentary and common-sense tactics are required.

Fat Male Zombie
Fat Male Zombie
HP Damage
Melee Vomit Explosion
34 12 - -
EXP Speed
Calm Disturbed Enraged
22.5 0.6 1.6 3
Density Zones
0.662 EXP/HP B / G / Y / O / R / DR

These are the strongest of all un-mutated zombies that can be found near the outpost.
Like the Fat Female Zombies, they are not knocked back or staggered by weak weapons.
Their bodies have a higher fat index than the average zombie, but there is a good bit of muscle to support it.
These zombies can be thick bullet cushions and take more ammo to bring down.

Notes:
- A more durable male zombie but easier to target.

Tactics/Strategies:
- Only rudimentary and common-sense tactics are required.

Tier 2 - Burned ("Purple") Zombies[]

These zombies are equivalent to the Purple zombies from the 2D era, being more durable and powerful than the basic Gray Zombies. Almost all of them appears from the Green to the Dark Red zone, with the exception of Blood Hounds which starts appearing from the Yellow zone instead.

Burned Female Zombie
HP Damage
Melee Vomit Explosion
70 22 - -
EXP Speed
Calm Disturbed Enraged
75 1 2.5 5
Density Zones
1.071 EXP/HP G / Y / O / R / DR


The female counterpart of the Burned Male Zombie.
Due to the looting at the start of the outbreak, many citizens of Fairview barricaded their houses to keep safe.
Once barricaded, there was no way out in case of a fire, which is the cause of death for most if not all burned zombies.
Although weaker than their male counterparts, they are also somewhat faster than the Burned Male Zombies.
They are also a bit more common than their male counterparts.

Notes:
- Faster and more resistant version of the Female Zombie.
- It is believed that most burned zombies are Flaming Zombies whose flame eventually burned out.

Tactics/Strategies:
- Only rudimentary and common-sense tactics are required.

Irradiated Female Zombie
HP Damage
Melee Vomit Explosion
70 22 20 -
EXP Speed
Calm Disturbed Enraged
75 1 2.5 5
Density Zones
1.071 EXP/HP G / Y / O / R / DR

The female counterpart of the Irradiated Male Zombie. Slightly weaker and visibly smaller in size, but also slightly faster.

Notes:
- This zombie is basically a Burned Female Zombie with a ranged attack.
- Ranged vomit attack is approximately 1.5 to 2 times the longest melee range.

Tactics/Strategies:
- Vomit attack can be exploited as it is immobile during the animation.

Burned Male Zombie
Burned Male Zombie
HP Damage
Melee Vomit Explosion
80 24 - -
EXP Speed
Calm Disturbed Enraged
82.5 1 2.5 5
Density Zones
1.031 EXP/HP G / Y / O / R / DR


In the first weeks after the Outbreak, it was still believed that immolation of the infected would destroy the virus.
It was not until the first burned zombie sightings that the survivors realized that exposure to fire makes the virus and its host more powerful.
Although Burned Female Zombies have been observed as the most common form of Burned Zombies, there are still occasional reports of Male Burned Zombies being encountered...

Notes:
- Faster and more resistant version of the Male Zombie.
- It is believed that most burned zombies are Flaming Zombies whose flame eventually burned out.

Tactics/Strategies:
- Only rudimentary and common-sense tactics are required.

Irradiated Male Zombie
HP Damage
Melee Vomit Explosion
80 24 20 -
EXP Speed
Calm Disturbed Enraged
82.5 1 2.5 5
Density Zones
1.031 EXP/HP G / Y / O / R / DR


It is believed that this zombie was a burned zombie but after eating many humans, the digestive system in the zombie could not digest the food fast enough.
Thus the body sensed that the only way to allow continued feeding was to eject the stomach acid and the leftovers of a previous meal.
To that end, the only way to empty the stomach's contents quickly was to shoot them out of the zombie's mouth in deadly chunks of highly-acidic stomach juice.
Needless to say, occasionally, this offal is found to include some charming parts from the bodies of unfortunate survivors.

Notes:
- This zombie is basically a Burned Male Zombie with a ranged attack.
- Ranged vomit attack is approximately 1.5 to 2 times the range of the longest Melee weapon range.

Tactics/Strategies:
- Vomit attack animation can be exploited as it is immobile during the animation.

Blood Hound
Blood Hound
HP Damage
Melee Vomit Explosion
100 50 - -
EXP Speed
Calm Disturbed Enraged
150 2.5 5 8
Density Zones
1.5 EXP/HP Y / O / R / DR


The Blood Hound appears to be one of the few varieties of infected canine prowling the streets of Fairview.
Its flesh is exposed to reveal glistening musculature beneath - the grotesque look of the beast demoralizing and sickening to most who look upon it.
Its quickly-snapping jaws are filled with sharp teeth that clamp shut on any that stray too close and will remain shut until the prey is downed or a chunk of flesh is ripped away.

Notes:
- Dealing noticeably more damage than other infected in the Blue or Green Zone, this variant of the Dog Zombie poses a significant risk to new, inexperienced players.

Tactics/Strategies:
- As the specimen approaches, strike at the face, sidestep the attack, strike at side and rear.

Tier 3 - Red Zombies[]

These zombies are even more powerful than the Burned Zombies, and start to appear from the Red zone. They gradually disappears in later parts of the Black zone.

Red Long Arm
Red Long Arm
HP Damage
Melee Vomit Explosion
140 40 - -
EXP Speed
Calm Disturbed Enraged
187.5 1.2 2.5 4.4
Density Zones
1.339 EXP/HP R / DR / Early-BL


In the earliest days of the outbreak, the Long Arms were among the most feared mutants in Fairview.
When the outbreak of new mutants broke loose, the Long Arms gradually began to disappear, and for a time, they were believed to have died out.
This belief has been completely shattered by the reappearance of these fearsome creatures.
These mutants are believed to have developed longer arms as a result of N4 mutations, combined with an increased intake of calcium in their diet, due to their reported habit of consuming the bones of their prey.
With similar speed to a Bone and reach paralleling that of a Tendril, the Long Arms is not to be taken lightly — then again, it never WAS advised to take these creatures lightly in combat.

Notes:
- Melee attack range is approximately twice that of the longest Melee weapon range.
- Melee attacks can be both frontal and lateral.
- Melee attack variety makes engaging hordes with Melee weapons riskier than in lower-tier Zones.

Tactics/Strategies:
- Maintain distance or alternatively, sidestep attack, strike at side or rear.
- Step away diagonally to avoid both frontal and lateral attack patterns.

Red Rumbler
Red Rumbler
HP Damage
Melee Vomit Explosion
170 50 - -
EXP Speed
Calm Disturbed Enraged
210 1 2 4
Density Zones
1.235 EXP/HP R / DR / Early-BL


This hulking beast is among the new infected that have been reported in the most recent outbreak of mutations.
Named for their low, rumbling growl, Rumblers appear to be a more evolved form of the Fat Red Zombies and its stronger variants first seen in the initial outbreak.
They have undergone mutations that are extremely similar to those seen in Bones, except their body structure is apparently meant to emphasize offensive ability more than that of a Bone.
Based on the few studies performed by scientists, their torso has developed an enlarged rib cage surrounded by compacted fat tissue as a defensive measure, while their stockier, enlarged arm muscles allow them to deliver strikes with more force than a Bone.
However, they sacrifice speed for power and are not capable of moving as quickly as a Bone.

Notes:
- More durable evolution of the Bone with a shorter melee attack range and higher Damage-Per-Hit.

Tactics/Strategies:
- Maintain distance or alternatively, sidestep attack, strike at side or rear.

Tier 4 - Black Zombies[]

These are the second most powerful forms of Normal Zombies available in the game. They can only be encountered in the Black and White zone.

Black Long Arm
Black Long Arm
HP Damage
Melee Vomit Explosion
200 75 - -
EXP Speed
Calm Disturbed Enraged
262.5 1.4 2.7 5.7
Density Zones
1.313 EXP/HP BL / W


A fast and dangerous long arm with fearsome reach found in the end zone.
Once Red Long Arms, these creatures' skins have begun to putrefy and decay, hence their blackened appearances.
Despite this apparent degradation, however, these creatures are stronger and faster than their red counterparts.
It is speculated that the virus is actually allowing the superfluous outer soft tissue to rot away, and is instead focusing on enhancing the host's skeletal and muscular systems.

Notes:
- More durable and agile evolution of the Red Long Arm with a higher Damage-Per-Hit.
- Melee attack range is approximately twice that of the longest Melee weapon range.
- Melee attacks can be both frontal and lateral.
- Melee attack variety makes engaging hordes with Melee weapons riskier than in lower-tier Zones.

Tactics/Strategies:
- Maintain distance or alternatively, sidestep attack, strike at side or rear.
- Step away diagonally to avoid both frontal and lateral attack patterns.

Irradiated Black Long Arm
HP Damage
Melee Vomit Explosion
200 75 60 -
EXP Speed
Calm Disturbed Enraged
300 1.4 2.7 5.7
Density Zones
1.5 EXP/HP BL / W


A highly-dangerous irradiated infected found in the end zone, evolved from the Green Long-armed zombies seen in the initial outbreak.
The radiation it was exposed to has gradually led to further mutations beyond those of the N4 virus.
It now possesses the ability to launch streams of acidic vomit like a normal irradiated infected, but with far more range - its vomit can reach as far as that of a Flaming Mother.
Furthermore, it is far more potent - where Brutes and Irradiated Zombies spit a mixture of consumed flesh and hydrochloric stomach acid, mutations in the Irradiated Black Long Arm's gut have given it the ability to spew pure concentrated hydrochloric acid, making its vomit far more dangerous and harmful.

Notes:
- This zombie is basically a Black Long Arm with a ranged attack.
- Melee attack range is approximately three times the range of the longest Melee weapon range.
- Melee attacks can be both frontal and lateral.
- Melee attack variety makes engaging hordes with Melee weapons riskier than in lower-tier Zones.

Tactics/Strategies:
- Maintain distance or alternatively, sidestep attack, strike at side or rear.
- Step away diagonally to avoid both frontal and lateral attack patterns.
- Vomit attack animation can be exploited as it is immobile during the animation.

Flesh Hound
Flesh Hound
HP Damage
Melee Vomit Explosion
200 100 - -
EXP Speed
Calm Disturbed Enraged
300 3 6 11
Density Zones
1.5 EXP/HP BL / W


An extremely fast and powerful infected canine found in the End Zones which seems to have undergone skin putrefaction and blackening like in other Black mutants.
These beasts can and will chase you down, and are dangerous when combated in packs of two or more.
Extreme caution is advised when fighting these monstrosities.

Notes:
- Due to its high speed and Damage-Per-Hit, the Flesh Hound is one of the most dangerous Normal Zombies encountered.

Tactics/Strategies:
- As the specimen approaches, strike at the face, sidestep the attack, strike at side and rear.

Black Rumbler
Black Rumbler
HP Damage
Melee Vomit Explosion
250 70 - -
EXP Speed
Calm Disturbed Enraged
285 1.2 2.2 4.2
Density Zones
1.14 EXP/HP BL / W


A more deadly variation to the original Rumbler that is harder to kill and more dangerous to survivors.
Like other black zombies, its skin has begun to putrefy and decay.
However, the creature's bones, muscles, and even fat are now denser and stronger than their Red counterparts.

Notes:
- More durable evolution of the Red Rumbler with a higher Damage-Per-Hit.

Tactics/Strategies:
- Maintain distance or alternatively, sidestep attack, strike at side or rear.

Irradiated Black Rumbler
HP Damage
Melee Vomit Explosion
250 70 - 60
EXP Speed
Calm Disturbed Enraged
285 1.2 2.2 4.2
Density Zones
1.14 EXP/HP BL / W


A highly dangerous infected found in the end zone.
Descended from the Irradiated Fat Green zombies seen in the initial outbreak, the combination of mutations from both radiation and the N4 virus have made it more dangerous than ever.
Methane is generated by the large amounts of decomposing flesh it consumes and is slowly pressurized in the confinement of the Irradiated Rumbler's extremely sturdy torso.
This turns the Irradiated Rumbler into an even stronger walking bomb than the Bloat.
Upon death, its body explodes into a hail of bony shrapnel and hard chunks of compacted fat, the latter of which some survivors have compared to being hit by rubber bullets at point-blank range, capable of breaking bones.
Careful strikes from a melee weapon should be able to destroy its motor functions while avoiding the pressurized chest, however, allowing survivors to get in close without having to worry about the explosive aftermath.

Notes:
- This zombie is basically a Black Rumbler with less Damage-Per-Hit that explodes upon death if not killed with a Melee weapon.
- Blast radius of explosion is comparable to that of a grenade launcher.
- In Multiplayer, Melee combat is not advised as damage from firearms can still cause an explosion upon death.

Tactics/Strategies:
- Maintain distance or alternatively, sidestep attack, strike at side or rear.
- Prioritize the killing of this specimen in hordes to prevent players from harming one another, due to the resulting explosions.

Tier 5 - Evolved Zombies[]

These zombies replaced the Black Zombies as the most powerful Normal Zombie variants in the game. They can only be encountered in the furthest reach of the South Eastern Zone, also known as the Death Row.

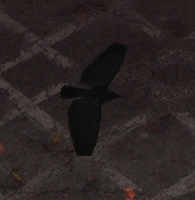
Crow
Crow
HP Damage
Melee Vomit Explosion
150 100 - -
EXP Speed
Calm Disturbed Enraged
75 7 7 10
Density Zones
0.5 EXP/HP SEZ

This variant found in the gloomy skies of the southeastern border has become quite aggressive, although it is unknown if is the avian strain of the N4 combined with the red mist variant or just hunger that caused this change. The truth is that the crows knew how to adapt to the bleak conditions present in the southern areas and now they persecute any fool who dares to venture into these new areas and their presents dangers, mainly wishing to feast on their eyes and brains.

Notes:
- Its small size, high speed and dark color makes it difficult to spot.
- Does not appear indoors. (Usually)

Tactics/Strategies:

Evolved Long Arm
Evolved Long Arm
HP Damage
Melee Vomit Explosion
500 250 - -
EXP Speed
Calm Disturbed Enraged
540 3 13 13
Density Zones
1.08 EXP/HP SEZ


Notes:
- Transitions into enraged mode 1 second after spotting player.

Tactics/Strategies:
- Dispose the target quickly; ideally a high damage rifle can 1 shot it before giving it a chance to sprint at you.
- Watch your step; careless movement will draw attention from multiple Evolved Longarms and quickly escalate into horde of sprinting zombies.

Armored Evolved Long Arm
HP Damage
Melee Vomit Explosion
600
+ 800 Shield
300 - -
EXP Speed
Calm Disturbed Enraged
660 3 13 13
Density Zones
1.1 EXP/HP SEZ


Notes:

  • Frontal area is protected by heavy armor (500 damage in one shot will instantly break it)
  • Armor protects against gunshots from afar; melee weapons, explosives and point blank gunshots will bypass armor.
  • Transitions into enraged mode 1 second after spotting player.
  • Aggro rushes in SEZ compose almost exclusively of Armored Evolved Long Arms.

Tactics/Strategies:
- Only weapons with AP can stagger/damage at longer range.
- Weapons without AP property can bypass armor by attacking at point blank range.

Evolved Rumbler
Evolved Rumbler
HP Damage
Melee Vomit Explosion
600 250 150 -
EXP Speed
Calm Disturbed Enraged
600 3 6 6
Density Zones
1 EXP/HP SEZ


Notes:
- Capable of vomit attack.
- Transitions into enraged mode 1 second after spotting player.

Tactics/Strategies:

Cystic Evolved Rumbler
HP Damage
Melee Vomit Explosion
700 300 200 200
EXP Speed
Calm Disturbed Enraged
720 3 6 6
Density Zones
1.029 EXP/HP SEZ


Notes:
- Capable of both vomit and explosion attack.
- Transitions into enraged mode 1 second after spotting player.

Tactics/Strategies:

Canary
Canary
HP Damage
Melee Vomit Explosion
250 150 - -
EXP Speed
Calm Disturbed Enraged
300 3 6 6
Density Zones
1.2 EXP/HP SEZ / WL


Notes:
- Capable of both a normal attack, and a screaming action like the Siren.
- Prefers normal attack at close range, and screaming when far away.

Tactics/Strategies:
- Engaging in close range will force the Canary to perform melee attacks and be unable to call reinforcements.

Raven Ridge Forest Zombies[]

They can only be encountered in the Forest biome of Raven Ridge.

Hiker Zombie
HP Damage
Melee Vomit Explosion
700 250 - -
EXP Speed
Calm Disturbed Enraged
1,260 1.5 6 13
Density Zones
1.8 EXP/HP RR


Notes:

Tactics/Strategies:

Wolfhound
HP Damage
Melee Vomit Explosion
500 250 - -
EXP Speed
Calm Disturbed Enraged
720 8 8 16.5
Density Zones
1.44 EXP/HP RR


Notes:

Tactics/Strategies:

Mirestag
HP Damage
Melee Vomit Explosion
600 250 - -
EXP Speed
Calm Disturbed Enraged
1,080 1.5 7.5 13
Density Zones
1.8 EXP/HP RR


Notes:
20% Knockback Resistance

Tactics/Strategies:

Zombear
HP Damage
Melee Vomit Explosion
5,000 400 - -
EXP Speed
Calm Disturbed Enraged
9,000 1.5 5.5 14
Density Zones
1.8 EXP/HP RR


Notes:

Tactics/Strategies:

Choker
HP Damage
Melee Vomit Explosion
600 150 - -
EXP Speed
Calm Disturbed Enraged
600 1.5 6 12
Density Zones
1 EXP/HP RR


Notes:
Turns invisible until a player is within a 3m range.

Tactics/Strategies:

Inmate Zombie
HP Damage
Melee Vomit Explosion
800 350 - -
EXP Speed
Calm Disturbed Enraged
1,440 1.5 6 14
Density Zones
1.8 EXP/HP RR


Notes:
75% Knockback Resistance

Tactics/Strategies:

Irradiated Inmate Zombie
HP Damage
Melee Vomit Explosion
800 300 - 250
EXP Speed
Calm Disturbed Enraged
1,440 1.5 6 13
Density Zones
1.8 EXP/HP RR


Notes:
50% Knockback Resistance

Tactics/Strategies:

Prison Shieldbearer
HP Damage
Melee Vomit Explosion
800
+ 2,000 Shield
250 - -
EXP Speed
Calm Disturbed Enraged
1,440 1.5 6 11
Density Zones
1.8 EXP/HP RR


Notes:
60% Knockback Resistance
Armour has a 9,999 instant break damage threshold.

Tactics/Strategies:

Prison Stunlancer
HP Damage
Melee Vomit Explosion
800 250 - -
EXP Speed
Calm Disturbed Enraged
1,440 1.5 6 11
Density Zones
1.8 EXP/HP RR


Notes:
60% Knockback Resistance
Stuns you for 0.5 seconds when hit.

Tactics/Strategies:

Raven Ridge Ashwood Zombies[]

They can only be encountered in the Ashwood biome of Raven Ridge.

Mega Wolfhound
HP Damage
Melee Vomit Explosion
500 900 - -
EXP Speed
Calm Disturbed Enraged
900 8 8 16.5
Density Zones
1.8 EXP/HP RR


Notes:
50% Fire Damage Resistance
20% Knockback Resistance

Tactics/Strategies:

Mega Mirestag
HP Damage
Melee Vomit Explosion
750 250 - -
EXP Speed
Calm Disturbed Enraged
1,500 1.5 8.5 13
Density Zones
2 EXP/HP RR


Notes:
50% Fire Damage Resistance
40% Knockback Resistance

Tactics/Strategies:

Mega Zombear
HP Damage
Melee Vomit Explosion
5,000
+ 700 Shield
400 - -
EXP Speed
Calm Disturbed Enraged
9,000 1.5 5.5 14
Density Zones
1.8 EXP/HP RR


Notes:
50% Fire Damage Resistance
80% Knockback Resistance
80% Stagger Resistance

Tactics/Strategies:

Firefighter Zombie
HP Damage
Melee Vomit Explosion
700 250 - -
EXP Speed
Calm Disturbed Enraged
1,260 1.5 6 12
Density Zones
1.8 EXP/HP RR


Notes:
80% Fire Damage Resistance

Tactics/Strategies:

Elite Military Zombie
HP Damage
Melee Vomit Explosion
700 250 - -
EXP Speed
Calm Disturbed Enraged
1,260 1.5 6 12
Density Zones
1.8 EXP/HP RR


Notes:

Tactics/Strategies:

Armoured Elite Military Zombie
HP Damage
Melee Vomit Explosion
700
+ 1,000 Shield
250 - -
EXP Speed
Calm Disturbed Enraged
1,260 1.5 8 12
Density Zones
1.8 EXP/HP RR


Notes:

Tactics/Strategies:

  • Frontal area is protected by heavy armor (1000 damage in one shot will instantly break it)
  • Armor protects against gunshots from afar; melee weapons, explosives and point blank gunshots will bypass armor.

Raven Ridge Toxic Zombies[]

They can only be encountered in the Toxic biome of Raven Ridge.

Chemical Worker Zombie
HP Damage
Melee Vomit Explosion
700 250 - -
EXP Speed
Calm Disturbed Enraged
1,260 1.5 5.0 12.0
Density Zones
1.8 EXP/HP RR


Notes:
20% Knockback Resistance

Tactics/Strategies:

Irradiated Hazmat Zombie
HP Damage
Melee Vomit Explosion
700 200 - 250
EXP Speed
Calm Disturbed Enraged
1,260 1.5 5.0 12.0
Density Zones
1.8 EXP/HP RR


Notes:
20% Knockback Resistance

Tactics/Strategies:

Elite Irradiated Hazmat Zombie
HP Damage
Melee Vomit Explosion
900 220 - 250
EXP Speed
Calm Disturbed Enraged
1,620 1.5 8.0 13.0
Density Zones
1.8 EXP/HP RR


Notes:
25% Slow Resistance

Tactics/Strategies:

Mutant Rat
HP Damage
Melee Vomit Explosion
400 150 - 250
EXP Speed
Calm Disturbed Enraged
800 2.0 12.5 15.0
Density Zones
2 EXP/HP RR


Notes:

  • 99% Knockback Resistance
  • Lunges forward a great distance when attacking.

Tactics/Strategies:

Toxic Wolfhound
HP Damage
Melee Vomit Explosion
500 300 - -
EXP Speed
Calm Disturbed Enraged
900 8 8 16.5
Density Zones
1.8 EXP/HP RR


Notes:
20% Knockback Resistance

Tactics/Strategies: <br

Toxic Mirestag
HP Damage
Melee Vomit Explosion
750 250 - -
EXP Speed
Calm Disturbed Enraged
1,500 1.5 8.5 13
Density Zones
2 EXP/HP RR


Notes:
40% Knockback Resistance

Tactics/Strategies:

Toxic Zombear
HP Damage
Melee Vomit Explosion
5,000
+ 700 Shield
400 - -
EXP Speed
Calm Disturbed Enraged
9,000 1.5 5.5 14
Density Zones
1.8 EXP/HP RR


Notes:
80% Knockback Resistance
80% Stagger Resistance

Tactics/Strategies:

Raven Ridge Summit Zombies[]

They can only be encountered in the Summit biome of Raven Ridge.

Snow Wolfhound
HP Damage
Melee Vomit Explosion
500 300 - -
EXP Speed
Calm Disturbed Enraged
900 8 8 16.5
Density Zones
1.8 EXP/HP RR


Notes:
25% Cryo Damage Resistance
20% Knockback Resistance
Slow Resistance

Tactics/Strategies:

Snow Mirestag
HP Damage
Melee Vomit Explosion
750 250 - -
EXP Speed
Calm Disturbed Enraged
1,500 1.5 8.5 13
Density Zones
2 EXP/HP RR


Notes:
25% Cryo Damage Resistance
40% Knockback Resistance
Slow Resistance

Tactics/Strategies:

Snow Zombear
HP Damage
Melee Vomit Explosion
5,000
+ 700 Shield
400 - -
EXP Speed
Calm Disturbed Enraged
9,000 1.5 5.5 14
Density Zones
1.8 EXP/HP RR


Notes:
25% Cryo Damage Resistance
80% Knockback Resistance
80% Stagger Resistance
Slow Resistance

Tactics/Strategies:

Mutant Zombies[]

Due to the versatile nature of the N4 virus, unique mutants can be found deep in the city. These zombies are not as common as the other zombies, and wield additional abilities that make them even more formidable foes.

Yellow Zone Mutants[]

These mutants can only be encountered almost exclusively in the Yellow zone. For the most part, these are just weaker versions of later mutant types, designed to introduce the player to the concept of mutant zombies.

Bone
Bone
HP Damage
Melee Vomit Explosion
120 30 - -
EXP Speed
Calm Disturbed Enraged
220 1.2 2.5 5.0
Density Zones
1.833 EXP/HP Late-G / Y


Named for the bone-like protrusions from its body, the Bone was once a human with a strong skeletal structure and a defensive mindset. Its lean muscled frame provides it the ability to maneuver more quickly than most of Fairview's new bestiary. A weapon of any range is fine, as long as the user has the physical and mental proficiency to send this ghoul back to where it belongs.

Notes:

Tactics/Strategies:

Reaper
Reaper
HP Damage
Melee Vomit Explosion
100 35 - -
EXP Speed
Calm Disturbed Enraged
160 1 3.5 5
Density Zones
1.6 EXP/HP Late-G / Y


This mutant evolved from a human with a mid-size frame and a less than amicable disposition. Scouts' reports claim that these mutants originated from the area around Fairview's prison complex, north of Dogg's Stockade, suggesting that the prison's more aggressive inmates were among the first to become Reapers. The dominant arm of a Reaper is comprised of a massive razor-sharp blade. This essentially warns you not to face it with melee, as many who have done so—mostly stupid survivors with big blades—were usually outdone by an even stupider monster with an even bigger blade.

Notes:
- Blade attacks covers an area equivalent to 2x longest melee range in a 180° angle.
- Due to this and it's high damage in the early game, it is advised not to engage in melee combat against it.

Tactics/Strategies:

Small Bloat
Small Bloat
HP Damage
Melee Vomit Explosion
80 20 - 10
EXP Speed
Calm Disturbed Enraged
101.25 0.8 2.5 4.5
Density Zones
1.266 EXP/HP Late-G / Y


These mutants are generally thought to be the immature form of the larger Bloats around Precinct 13 and Fort Pastor. Like their larger 'relatives', they are fat, slow, and have a low damage threshold. Small Bloats are also volatile walking bombs; they explode upon death and release a blast of gastric acid and bone shards that can mortally wound any survivor who comes within the blast radius. Melee users are not completely helpless though - after a stroke of genius and an extended amount of experimentation afterwards from the former thugs of Dogg's Stockade, new strategies have been designed to quickly destroy the nervous system of the Small Bloat while leaving its body relatively intact, allowing melee users to neutralize it without getting green puke showered all over their clothing.

Notes:
- Explodes if the killing blow is not from a melee weapon.
- Blast radius of explosion is comparable to that of a grenade launcher.

Tactics/Strategies:

Orange-White Zone Mutants[]

These mutants can be encountered from the Orange to the White zone, except for the Siren which can also be encountered in the Yellow Zone and the Wasteland. As you go deeper into the Inner City, these mutants will be encountered more often.

Siren
Siren
HP Damage
Melee Vomit Explosion
70 0 - -
EXP Speed
Calm Disturbed Enraged
150 0.8 3.0 3.0
Density Zones
2.143 EXP/HP Y / O / R / DR / BL / W


Some scientists hypothesize that the N4 virus exploited a certain genetic anomaly which caused a secondary head to grow, along with the development of powerful vocal chords. It is a common mistake among amateur scouts to think that these creatures are just benign passersby—that is until their shrill scream pierces the air and amasses a horde. So unless you want a horde to grind, it is recommended to either completely avoid them or take them out quickly.

Notes:
- It has no attack, but it screams upon spotting a survivor, thus alerting and attracting infected for blocks around.
- You will have a 1 second reaction time to kill a Siren if it spots you before it screams and attracts a horde.
- If a siren is killed in mid-scream, she will not trigger a horde.

Tactics/Strategies:
- Ensure your next hit will be a critical and take out this enemy first to avoid alerting nearby infected.

Bloat
Bloat
HP Damage
Melee Vomit Explosion
200 40 - 40
EXP Speed
Calm Disturbed Enraged
300 1.2 3.2 4.5
Density Zones
1.5 EXP/HP O / R / DR / BL / W


One of the larger infected that ambles the streets of Fairview, the Bloat is more than capable when push comes to shove. Unlike other infected, which actively hunt out survivors to feast on, Bloats are more commonly seen scavenging off of the numerous corpses that litter the streets. Nevertheless, the Bloat will relentlessly pursue fresh meat if provoked. Despite being almost as large as most bosses, they are not even a fraction of the threat level posed by a Titan. They are rather slow, somewhat weak, and easily dispatched. The Bloat's appearance is a result of the buildup of methane gas within its body cavities (whether by the decomposing flesh of its diet or the result of Nerotonin-4 mutations isn't clear, but some have speculated that it is a combination of both). Like their smaller counterparts, Bloats are known to violently explode when slain, showering their aggressors with shards of bone and gastric acid. The same tactic used to disable Small Bloats without making it go boom also proved to be effective against this... even more bloated counterpart, however.

Notes:
- Explodes if the killing blow is not from a melee weapon.
- Blast radius of explosion is comparable to that of a grenade launcher.
- In Multiplayer, Melee combat is not advised as damage from firearms can still cause an explosion upon death.

Tactics/Strategies:
- Firearm-wielding players with slower movement speeds are advised to allow this infected to stop and attack you so you can gain distance before dispatching it.

Tendril
Tendril
HP Damage
Melee Vomit Explosion
235 50 - -
EXP Speed
Calm Disturbed Enraged
400 1.2 3.5 6.5
Density Zones
1.702 EXP/HP O / R / DR / BL / W


Once an ordinary female infected, the N4 virus mutated its unfortunate victim into a figure that looks like it walked out of a nightmare. Its moniker is derived from the meter-long tentacles that have replaced its arms. The Tendril now uses these tentacles to slam survivors with enough force to break multiple bones, severely bruise muscle tendons, and tear deep lacerations in the skin. This abomination is exceptionally deadly due to its heightened senses, unearthly reflexes, and ludicrous speed. Close-quarters combat isn't impossible, but it is not recommended. It is not uncommon for a survivor to be eviscerated before his weapon can be drawn against it. For some reason, Tendrils seem to more common in the Black Zone than any other mutants and attacks in larger groups.

Notes:
- Painfully fast and its deadly tentacles reach as far as the longest melee weapons.

Tactics/Strategies:

Spider
Spider
HP Damage
Melee Vomit Explosion
300 40 - -
EXP Speed
Calm Disturbed Enraged
337.5 2 6.2 6.2
Density Zones
1.125 EXP/HP O / R / DR / BL / W


The host of the virus must have been incredibly flexible and naturally dexterous to evolve into the mutant known as the Spider. The N4 viral mutations resulted in the growth of two extra pairs of arms, allowing the Spider to be among the fastest mutants encountered. These extra appendages also serve to lower the Spider's center of gravity, which makes these fiends impervious to weapon knockback. Spiders use their forelimbs to claw at survivors, and will even attempt to bite their target, but they evolved for agility, not physical power. Close combat is only advised under the condition that the survivor is quick enough to evade these blows and attack from behind. Weapons with large spread or rapid fire rate are most advocated because they leave plenty of room for error.

Notes:
- Greatly resistant to knockback and stuns.
- Unlike other infected, the spider goes straight from its calm state to its enraged state upon spotting a survivor.

Tactics/Strategies:
- Utilize poor turning radius to keep the Spider circling around you.
- Extremely dangerous when multiple are present, as they will stack and push the lead towards you while it is striking.

Brute
Brute
HP Damage
Melee Vomit Explosion
250 30 30 -
EXP Speed
Calm Disturbed Enraged
450 1.2 3.2 5.0
Density Zones
1.8 EXP/HP O / R / DR / BL / W


The N4 outbreak was not the first pandemic in recorded history; the obesity pandemic has plagued millions since the dawn of mankind. When the two are combined, you get this monster as a result. A protective adipose tissue layer has given the Brute the ability to take even more hits than a normal infected. And like all its other obese peers, it has the ability to dynamically eject its stomach contents, including caustic hydrochloric acid. Despite its relatively slow speed, long-range combat is seen as more useful than close/mid-ranged combat.

Notes:
- Ranged vomit attack reaches about 2.5-3x longest melee range.
- Vomit reaches significantly farther than that of irradiated zombies.

Tactics/Strategies:

Leaper
Leaper
HP Damage
Melee Vomit Explosion
350 9,999 - -
EXP Speed
Calm Disturbed Enraged
600 2.5 5.0 5.0
Density Zones
1.714 EXP/HP O / R / DR / BL / W


Survivors coming back from the deeper parts of the city have brought rumors of a grotesque creature. While some of these explorers argued that the proper name must be the 'Licker,' due to its very long tongue, 'Leaper' has become the name generally accepted in Fairview society. The Leaper sports a warped skeletal and muscular structure, rendering it only capable of walking with an awkward gait. Its muscles are tightly-packed, providing it with unrivaled physical strength. This mutant's tongue is perhaps its most striking feature, measuring anywhere from three to six feet in length (one to two meters). Recent research has found that the Leaper seems to have developed the ability to secrete an extremely potent, lethal toxin from glands around its tongue. It thus uses its tongue like a whip to slash its victims and infect them with the toxin, which causes fatal damage to the body within seconds. The Leaper's hands are just as dangerous as its tongue, packing enough force to punch through even the strongest of armors with deadly precision. Nonetheless, some of the braver survivors have suggested that melee combat with this cumbersome beast is better than ranged, as its slow speed makes it easy to avoid.

Notes:

Tactics/Strategies: A player wearing a Dawn Reactive with at least 1 Armor and 101 Health remaining is guaranteed to survive a leaper hit.

Wasteland Mutants[]

These types of zombies alongside the Titan form the population of the Wasteland, replacing all other types of zombies in existence. They are extremely buffed versions of previous mutant types, possessing incredible endurance and powerful attacks; extreme caution should be exercised when dealing with these mutants.

Black Bone
Black Bone
HP Damage
Melee Vomit Explosion
600 180 - 200
EXP Speed
Calm Disturbed Enraged
1,125 1.5 3.5 9
Density Zones
1.875 EXP/HP WL


It has become common knowledge that Bones are infected in the early stages of mutating into a deadly Titan, and from there it was thought it would eventually complete its mutation and become a Black Titan. With the discovery of the Black Bone, that theory was proven wrong. The Black Titan is actually the result of the virus within Bones evolving in a different way due to their more hostile environment, making the Black Titan more of a cousin to the Titan rather than the final stage of that mutation. The reasoning behind the Bones' skin turning black is unknown, however, it was discovered that this variant would explode on death much like a Bloat to increase the odds of its specific form of the virus to find a new host.

Notes:
- 35% Fire Damage Resistance
- Explodes if the killing blow is not from a melee weapon.
- Blast radius of explosion is comparable to that of a grenade launcher.

Tactics/Strategies:

Black Tendril
Black Tendril
HP Damage
Melee Vomit Explosion
300 220 - -
EXP Speed
Calm Disturbed Enraged
562.5 1.5 4.5 9
Density Zones
1.875 EXP/HP WL


While some forms of the mutations of the virus appear designed to increase the durability and longevity of their rotting vessels, the mutations found within the Wasteland's inhabitants have taken a different direction and the Black Tendril is one of the oddest. The virus has allowed the Tendrils' once powerful tentacle arms to decay and reach stages of black putrefaction, which many survivors believe is to increase the chances of spreading the infection to those that are hit and are not immune.

Notes: - 35% Fire Damage Resistance

Tactics/Strategies:

Hell Hound
Hell Hound
HP Damage
Melee Vomit Explosion
500 250 - -
EXP Speed
Calm Disturbed Enraged
937.5 3 6 11
Density Zones
1.875 EXP/HP WL


For the first time since the apocalypse has started, the virus has mutated to a point where it almost seems it is creating a new species entirely. These once beloved pups have become unrecognizable after years of the virus trying to adapt to its harsh surroundings and has turned Fido into a grotesque killing machine. Their visuals and extremely violent behavior brings a new meaning to hell on earth, which has led to them being called Hell Hounds. Survivors be warned, Hell Hounds travel in large packs and are one of the most common infected to come across while traversing the Wasteland.

Notes:

Tactics/Strategies:

Harvester
Harvester
HP Damage
Melee Vomit Explosion
550 9,999 - -
EXP Speed
Calm Disturbed Enraged
1,031.25 1.5 3.5 7
Density Zones
1.875 EXP/HP WL

A more deadly cousin of the Reaper, their scythes have evolved to the point where they can break through even the strongest of armors.

Notes:
- This mutation of the Reaper can only be found in the Wasteland.
- Instantly kills any survivor no matter their gear.
- Attacks using long range blade thrusts.

Tactics/Strategies:
- Maintain distance and backpedal; do not attempt to circle around it.
- Using Melee and firearms at close range against it is suicidal.

Retired[]

Shieldbearer
Shieldbearer
HP Damage
Melee Vomit Explosion
300 200 - -
EXP Speed
Calm Disturbed Enraged
562.5 1.5 3.5 8
Density Zones
1.875 EXP/HP WL


Notes:
- Can only be found in the Wasteland.
- Frontal shield negates all effects of bullets, but not melee attacks and explosives.
- Attacks blocked by shield do not award EXP.
- Shield breaks after 1500 damage, or after taking a bullet that deals over 100 damage (melee/explosive attacks, and multiple pellet attacks from weapons like Shotguns totaling 100 damage do not count).
- Temporarily drops shield when attacking.
- Has slower turn speed compared to normal zombies.

Tactics/Strategies:
- Use a Pistol/Rifle to quickly pop its shield.
- Melee and Explosives can ignore shield and hurt the Shieldbearer.

Bosses[]

Bosses were moved to a separate page so more information could be added about them. You can find them here: https://deadfrontier.fandom.com/wiki/Bosses

2D Beta Era[]

These zombies were available in "Dead Frontier Classic", the original version of Dead Frontier which was fully 2D and based on Adobe flash before the change to Unity3D for better overall performance, more freedom, usage of 3D game content and other advantages. In 2D, you always viewed the game from a Bird's Eye point of view.

2D Beta Era Zombies

Tier I - Gray Zombies (Infected)
Normal, gray or pale zombies are the first enemies you will meet when entering the city. They appear practically everywhere in the western half of the city and are perfect training targets for weaker survivors. The first 10 blocks around the outpost are almost only populated by these zombies, aside from the occasional Green Zombie. These are the zombies from which you loot Infected blood samples for Research missions.

Kid Zombie
Kid Zombie
15 Health Points, 9 Damage per Hit, 10 Experience

In-Game Name: Infected Child Zombie
Many children were infected during the first zombie outbreaks. Many more were easily killed by survivors soon after, and still more child zombies emerge from dreary buildings every day, walking reminders of what many of the citizens of Fairview had lost during the outbreak. Their pre-pubescent bodies being fragile, they are easily dispatched.


Female Zombie (2D)
Female Zombie (2D)
22 Health Points, 12 Damage per Hit, 14 Experience

In-Game Name: Infected Female Zombie
Mothers, daughters, sisters, aunts, wives, and friends who lost their lives in the early stages of the zombie outbreak. They retain no memories of their former lives and attack any and all humans, even ones with whom they shared the deepest connections with. Survivors who recognize their loved ones have had trouble killing them, and those that have say it's one of the darkest moments they have ever experienced.


Female Naked Zombie
Female Naked Zombie
22 Health Points, 12 Damage per Hit, 14 Experience

In-Game Name: Infected Female Zombie
Some humans were seemingly caught naked while being transformed from infection into the monsters they now are. Many speculate that these undead females were once call-girls and prostitutes who were still on duty when the epidemic struck, or simply women who were taking showers. Like Sodom and Gomorrah before it, Fairview is burning for all its sins. Sick parodies of the human ideals of beauty, these undead women walk about the familiar streets they once patrolled so very long ago.


Male Zombie (2D)
Male Zombie (2D)
26 Health Points, 15 Damage per Hit, 14 Experience

In-Game Name: Infected Male Zombie
Much tougher than the female and kid zombies, because they are less affected by knockback and deal more damage. Their additional muscle mass enables them to take a lot of punishment, so beware of male zombies if you are not certain you will win in a fight with one.


Male Naked Zombie
Male Naked Zombie
26 Health Points, 15 Damage per Hit, 14 Experience

In-Game Name: Infected Male Zombie
Some humans were seemingly caught naked while being transformed from infection into the monsters they now are. These unfortunate men were caught taking a shower, sleeping naked, or buying a prostitute's services when the epidemic struck. They now prowl the streets with the clothed zombies.


Female Fat Zombie
Female Fat Zombie
30 Health Points, 15 Damage per Hit, 19 Experience

In-Game Name: Infected Female Zombie
Slightly weaker than a male fat zombie, identifiable by the blue shower cap it wears. Fat zombies are very resistant to knockback and weak hits such as a non-critical chainsaw or knife hit won't interrupt its attacks nor be able to stop them once they're coming for you. They were hungry during life, and now they're even more hungry after getting infected.


Male Fat Zombie
Male Fat Zombie
34 Health Points, 18 Damage per Hit, 19 Experience

In-Game Name: Infected Male Zombie
These are the strongest of all normal zombies that can be found near the outpost. Like the Female Fat Zombies, they are not knocked back or interrupted by weak weapons and should be fought with caution. Their body seems to be mainly a bunch of fat, but there's a good bit of muscle within that as well - that mixture makes them both powerful and quite resistant to most weaker attacks.


Tier II - Purple Zombies (Burnt/Charred Zombies) & Crows
Purple-grayish zombies and crows will initially appear about 10 blocks away from the outpost in any direction. Even though purple is a very unusual skin color, they are almost always called like that since their skin does in fact have a very subtle magenta tone. During the "Burning Days", a lot of zombies were simply wounded, bound together and burned on large piles which can still be found in the city.

Yet a good lot of zombies survived this, only their clothes, human skin and the ropes turned to ashes, while the highly regenerative N4 virus generated a new skin right above the zombies' muscles. At first this skin was blue, then soon it turned purple and stayed that way. Due to these mutations and their history, these zombies are also referred to as "Charred Zombies". These are the zombies from which you loot Charred/Crow blood Samples for Research missions.

Crow
Crow
5 Health Points, 38 Damage per Hit, 18 Experience

In-Game Name: Crow
Whether they are birds that have been feeding on infected flesh and are infected by an avian strain of the N4 virus, or are just driven by extreme hunger, the crows of Fairview are known to attack survivors. While they are weak, they can fly over any terrain and do massive damage, as they hit exposed areas on a survivor's head and neck. While they often hunt alone, they are known to come in flocks when aggro is high.

Crows cannot appear in buildings.


Female Purple Zombie
65 ~ 72 Health Points, 33 Damage per Hit, 58 Experience

In-Game Name: Female Charred Zombie
The weaker one of the two purple zombies, recognizable mostly by its size. Female purple zombies deal significantly more damage than normal zombies but have slightly shorter reach. Purple zombies are believed to be burned, as they are often found in large bonfire piles.


Male Purple Zombie
Male Purple Zombie
~ 79 Health Points, 36 Damage per Hit, 58 Experience

In-Game Name: Male Charred Zombie
The male counterpart to the purple family is more heavily built than its female counterpart. Purple male zombies are less affected by knockback than normal male zombies, and deal a lot more damage.


Tier III - Red Zombies (Mutated Zombies)
Red zombies, fat red zombies, and long armed red zombies, all horribly mutated into monsters and with differing features, whether it be a huge gain in muscle or an extension in skeletal structure, are found in stages, meaning they aren't truly one group. They appear about 20 or 30 blocks away from the outpost and are the strongest of all regular zombies. These are the zombies from which you loot Mutant/Adv. Mutant blood Samples for Research missions.

Red Zombie
Red Zombie
109 ~ 128 Health Points, 51 Damage per Hit, 96 Experience

In-Game Name: Mutant Zombie
A red zombie, with more muscle and a grotesque, almost alien appearance, is a dangerous foe by any standards. When he gains speed he is a force to be reckoned with. Compared to normal and purple zombies, red zombies do a lot of damage when they hit you. This kind of zombie was first seen about 20 blocks away from the outpost. Furthermore, some people have been fooled by these zombies into thinking they are Long-Armed Red Zombies - both are much larger than their unmutated comrades and nearly have the same appearance, their only difference is that Long-Armed have their arms jutting out much further, obviously.


Fat Red Zombie
Fat Red Zombie
~ 135 Health Points, 60 Damage per Hit, 120 Experience

In-Game Name: Mutant Zombie
The fatter version of the Red Zombie. Don't be fooled - they are harder to kill and knock back due to their many layers of protective fat and corrupted flesh. The "downside" of their additional strength and resistance against hits is that they move slightly slower than regular red zombies. At about 30 blocks away from the outpost, fat red zombies were spotted.


Long-Armed Red Zombie
~ 180 Health Points, 75 Damage per Hit, 156 Experience

In-Game Name: Advanced Mutant Zombie
These zombies are far stronger than both red zombies and their fatter counterpart and have replaced the shiny red zombies. Their long arms extend their reach of melee attacks quite a bit, so being a skilled runner will help. They are thought to have grown long arms as the result of eating the bones, and therefore the calcium, of their prey. It is more likely, however, results of mutations from exposure to N4. Long armed zombies are only found in the farthest Northern and Southern reaches of the city. It is said that those survivors who use weaker weapons have suicidal tendencies.


Tier IV - Green Zombies (Irradiated Zombies)
A few zombies are heavily irradiated versions of their brethren, thus meaning they must have been exposed to radiation of some sort, causing them to glow green. They stick out and can be seen easily, even against the dark horizon. They are the first Infected to appear in the screen. They randomly appear in their weaker brethren's zone or even farther out in the Inner City. All of them possess extraordinary health, strength and speed once angered or sufficiently damaged. All green zombies carry some kind of valuable item, the quality of which depends on the type of monster and area where it was found. Looting this reward, however, is difficult due to the many weaker zombies that always follow these beasts to share in the almost always guaranteed meal after a battle. Green zombies prefer to ambush their prey when they are hiding in buildings to entrap and swarm them with their "minion" zombies, which appear to follow them around, or attract them. Whatever theories say about them, they're still threats. After December 27th 2008, the appearance rate of Green Zombies was increased to counter complaints that looting wasn't fair, and that one should have to earn rarer items by fighting for them.

(Note: With the release of missions, some insight was given on green zombies. Green zombies are referred to as "irradiated" - players may be tasked with looting "Irradiated" Blood Samples from green zombies.)

Green Zombie
Green Zombie
~ 280 Health Points, 33 Damage per Hit, 300 Experience

In-Game Name: Irradiated Zombie
These rare zombies appear at random, usually somewhere near the outpost, mostly seen in buildings. They shamble like their allies at first, then run faster at you, as they take damage. You can always search their bodies after they die and you will probably find blood samples, armour, weapons, or other low level items from them.

Appears randomly in the Grey and Purple zones.


Green Muscle Zombie
Green Muscle Zombie
~ 500 Health Points, 51 Damage per Hit, 900 Experience

In-Game Name: Irradiated Charred Zombie
Recently a much stronger version of the green zombie appeared near the center of Fairview; the Green Muscle Zombie. They look about the same as a Purple Zombie but pack a much heavier punch. They are rumored to be more common than the the fat green and the long armed green zombie, but carry less valuable items with them in comparison. Don't confuse them with normal green zombies, as they look similar, but they are darker and the power difference is enormous. An easy way to discern between Normal Greens and Muscles Greens is the crest running down the middle of their head (common to male purple zombies). If you see this, you're in for a fight.

Appears randomly in the Red and Dark Red zones.


Fat Green Zombie
Fat Green Zombie
~ 800 Health Points, 65 Damage per Hit, 1,125 Experience

In-Game Name: Irradiated Mutant
The fatter counterpart of a green zombie, they are much stronger, as well as slower. Fat Green sightings have been reported only a few streets away from the northeast and southeast extremes of the map. Like any other green (Boss) zombie, they raise the aggression and attention of nearby zombies by large amounts so killing and looting Fat Greens will be much more difficult due to their rare appearances having been only reported in the most dangerous of areas.

Appears randomly in the early Long-Armed Zombie zone.


Long-Armed Green Zombie
~ 1,000 Health Points, 75 Damage per Hit, 2,250 Experience

In-Game Name: Irradiated Advanced Mutant
This is currently the toughest as well as the second rarest kind of zombie known by any survivors. Not only do they possess enormous strength, but long armed red zombies always surround them like minions. This is because the few reported appearances of this species of zombie happened at the northeastern end of the sector nicknamed Death Row or the southeastern at the end of the sector. Either pack some serious firepower with you, or don't even think about fighting. Even if you manage to kill it, you will still be surrounded by lots of long armed red zombies, which want to avenge their master by not letting you loot it so easily. If you wish to fight one, high agility and endurance are strongly recommended. If you happen to find this beast and lack agility, endurance, and courage you are recommended to get your arse back to the outpost as soon as possible because of massive amounts of aggro that always appear with this monster.

Appears in the deepest parts of the Long-Armed Zombie zone. (= GLAZ - Green-Long Arm Zone)


Tier V - The Behemoth

Behemoth
Behemoth
~ 2,500 Health Points, ~ 82 Damage per Hit, 12,000 Experience

In-Game Name: Behemoth
Nicknamed "Big Red", the Behemoth is an extremely nasty mutant. Theories of its/their origin range from a rare individual having the right genetic blueprint to mutate into this lifeform, a new strain of N4, or a biological weapon let loose by insane, evil corporations. It is possible that this was the very first human to be infected, due to the fact its condition is much farther advanced than other zombies. Large spikes can be seen protruding from its back and arms, and its muscles and skeletal system are no longer human, increasing its height to an estimated 16 feet and giving it ungodly amounts of strength and speed. Rumors say that it walks through the city day and night, always following the loudest noises of dying brethren, but these are, like every rumor, unconfirmed, and used to scare children (and wanna-be explorers). So you may run into the Behemoth, just after slaughtering several groups of zombies nearby, but it may also find you randomly. Fleeing and surviving hunters tell that they run faster, once angered and heavily damaged. A few others even tell tales of having found precious items after slaying them in harrowing engagements, but no one ever found a dead Behemoth even near these battlefields, nor anywhere else. There are theories that this may mean that they possess great regenerative powers, and there may only be one singular Behemoth. It may be what caused the old helicopter to crash, as part of the last radio transmission was: "MOTHERF***ING, HUGE MOTHERF***ER!"

Appears randomly anywhere around Fairview City. Max aggro can also make him appear.

Old Zombies[]

These zombies appeared in the earlier stages of the infection, but vanished from the city after several weeks.

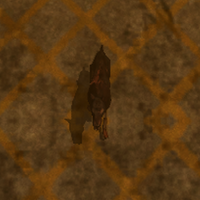
Old Zombies

Blue Zombies
The blue zombies vanished shortly after being first discovered and were replaced by the commonly called "purple" zombies, which reside in the same area but are a bit stronger than the blue ones. Rumors say that the blue zombies possibly evolved, but too many people believe otherwise, as zombies do not breed, so most people say that their glowing flesh simply rotted.

"Female Blue Zombie" The Female Blue Zombie ~ 61 - 65 HP, 53 EXP [Pen Knife Units]

The female zombie of the blue family, which are weaker than their male version, but still resemble a much greater threat, than any of the normal zombies.

"Male Blue Zombie" The Male Blue Zombie~ 71 - 75 HP, 53 EXP [Pen Knife Units]

The male counterpart of the blue zombie family, which carries more than triple the strength of a regular male zombie within itself, and can be found quite a bit away from the safety of civilization.

Red Zombies
These started appearing around 30 screens away from the outpost, currently there are only reports of several kinds of male and fat zombies. They are the "prototype" reds in the game's early stages.

"Red Zombie" The Red Zombie ~ 91 - 95 HP, 68 EXP [Pen Knife Units]

These red zombies are covered with the blood of their prey. Either way, if you meet one of them, you are already deep in their territory and these guys don't like visitors. Except for lunch of course. Before even considering to fight them, make sure you are well equipped and have enough lead to survive a wild rampage.

"Fat Red Zombie" The Fat Red Zombie ~ 116 - 120 HP, 75 XP [Pen Knife Units]

If you thought it couldn't get worse, then guess what, it always can when zombies are involved. Against these guys, there is not much you can do but swing or shoot your remaining weapons like mad. In case you get unlucky enough to meet these in pairs or groups, these guys come with major health risks.

"Shiny Red Zombie" Shiny Red Zombie ~ 150 HP, 90 EXP [Pen Knife Units]

A true beast of a zombie, which seems to be always covered in fresh blood. It's an inhabitant of the "Death Row", and a dangerous one for sure. The only thing left to do when you meet these monsters, is to run like you were being chased by Satan himself. But actually, the only thing you can do in Death Row is running, because no one truly survives Death Row.

"No Image Available" The Shiny Fat Red Zombie ~ 200 HP, ??? EXP [Pen Knife Units]

These monstrosities are, by anyone's account, truly terrifying to behold. The Shiny Fat Red Zombie is a very rare zombie. Many people have been killed by these creatures, and the general advice is that if you meet one, run. Run for your life.

Advertisement