Missions in the 3D mode were released for Gold Members on August 09, 2011. Players without Gold Membership gained access to missions on August 24, 2011. The missions are activated by entering one of the four Outposts.
You are allowed to play two missions per day per outpost which means eight missions per day if you run between outposts. This means you can do a mission at Precinct 13, then do a mission at Fort Pastor within the same day. However, you cannot accept a mission in a second outpost if you already have an active mission in any other outpost. If you do not finish a mission on time and are still in the process of doing it, the mission will end. It will not be shown on the map anymore, and you will not be able to finish it.
To finish a mission you need to complete the objective and return to the outpost before the mission expires.
The reward values in parenthesis are the rewards for Gold Members.
All missions listed here are in order from top to bottom. Every mission has the same time limit to accomplish which is about 8-9 hours before it expires. After each mission, there will be about a 2 hours and 30 minutes break before the next mission begins. When all missions have been accomplished, the mission cycle will repeat over again from the top, to the bottom. In this way, if a player misses a mission he/she can still try it when the next mission cycle begins.
Nastya's Holdout Missions
| The Doll |
|---|
|
The Doll Last night one of our patrols found a little girl wandering alone in the streets. She can't of been alone out there for long, so it's likely she was with a group of survivors at some stage. We'd like to start a search for them, but we have no idea where to look. We were hoping Katie might be able to provide us with some information. Unfortunately she appears to have lost or repressed most her recent memories. The only thing she does seem to know is that she lost her dolly. We'd like you to look for the doll. Hopefully being reunited with it will trigger some memories about what happened. I've marked the area where she was found on your map, my hunch is the doll will be somewhere nearby. Good luck! Cash Reward:The value in brackets is the reward for Gold Members. $500 ($1000) |
| Map [[File:{{{Map}}}|center|650px]] |
| Walkthrough Find a lost doll. You must retrieve a lost doll 3 blocks south of Nastya's Holdout. Looting it has a random chance, but it's not impossible to find. |
| The Reunion |
|---|
|
The Reunion Katie, the little girl we rescued a couple of days ago has managed to remember what happened. Apparently her family were trying to reach the Holdout after hearing one of our radio broadcasts, but their truck broke down en route. Unfortunately they were attacked by a group of infected while they attempted to repair the vehicle. Katie said her dad told her to run and that's what she did. She ran so far that she couldn't remember her way back. Based on the girl's hazy description there are two possible locations this could of happened. My team and I are going to check out one of these locations, and we need you to search the other (which I've marked on your map). Chances are we'll only find bodies, but I want to be sure. If by some miracle they did survive the ordeal then we need to get them back to the Holdout asap. Cash Reward:The value in brackets is the reward for Gold Members. $750 ($1500) |
| Map [[File:{{{Map}}}|center|650px]] |
| Walkthrough Find Katie's father. You must travel southeast of Nastya's Holdout to the area highlighted on your map and find Katie's father. He will speak to you and you need to stand near him and defend against incoming infected. Once he finishes talking you will get a message saying you found Katie's family. There will be a moderate level of aggro expected during the search. |
| The Hunger |
|---|
|
The Hunger It's no secret, the Holdout is rapidly running out of food supplies. Today I had to reduce the daily ration by a further 25%. Our population is already sick and severely malnourished, and I fear that we'll be seeing a lot of deaths from starvation in the coming weeks if something isn't done. In the past we managed to survive simply by looting the neighboring households and stores of tinned supplies. However these resources are rapidly being depleted. Our only option in short term is to loot food supplies from further afield. One of our scout parties recently reported spotting several large food delivery trucks a couple of miles to the north. I want you to go to this location (I've marked it on your map) and bring back as many food supplies from the trucks as you can. Cash Reward:The value in brackets is the reward for Gold Members. $650 ($1300) |
| Map [[File:{{{Map}}}|center|650px]] |
| Walkthrough Find and bring back to the Holdout 3 crates of food supplies. They can be found in lootable trucks scattered around the areas marked on your map. |
| The Cure |
|---|
|
The Cure As you're probably aware, the scientists here at the Holdout have been working tirelessly in an attempt to find a cure for the N4 virus. Such a cure may be a very long way off, but it represents the best chance of humanity ever returning to any kind of normality. Therefore I consider our research program to extremely high priority. In order to conduct their research our scientists require a vast quantity of infected blood samples. Unfortunately these samples are incredibly difficult and dangerous to obtain so we don't exactly have many volunteers coming forward. So that's why I'm talking to you. I'd like you to travel to location I've marked on your map, collect 5 vials of infected blood and bring them back to the Holdout. Cash Reward:The value in brackets is the reward for Gold Members. $700 ($1400) |
| Map [[File:{{{Map}}}|center|650px]] |
| Walkthrough Loot 5 blood samples from the red-skinned zombies in the marked area. They can be commonly found in the junkyard in the bottom-left corner. A moderate level of aggro is highly expected during the search. |
| The Sickness |
|---|
|
The Sickness There appears to be an epidemic spreading through the Holdout. Dozens of people have fallen sick in the past few weeks, and we've already had several fatalities. Our doctors are of the opinion that it a kind of bacterial infection, some are even saying it's Cholera. Whatever it is, we need to halt it in it's tracks as soon as possible. To do this we need powerful anti-biotics, but we simply don't have enough available at this time. I've marked the location of a large pharmacy store on your map. I'd like you to go there and see if you can find a large quantity of these antibiotics. Maybe they have some in storage, or in one of their delivery trucks. If you find anything, please bring it back to me as quickly as you can. The faster we get the medicine the more lives we can save. Cash Reward:The value in brackets is the reward for Gold Members. $500 ($1000) |
| Map [[File:{{{Map}}}|center|650px]] |
| Walkthrough Find a box of medical supplies and bring it back to the Holdout. It can be looted off of a truck abandoned in the area indicated on your map. |
| The Flames |
|---|
|
The Flames One of our teams was out on a mission last night and encountered a large group of infected. In an attempt to halt their advance, the men threw petrol bombs. The flames quickly decimated the infected, all except one of them. The fire actually seemed to make this one stronger. It just kept burning whilst still chasing them. The men eventually opened fire, but this infected just didn't want to die. In the end it took over 600 rounds to bring him down. The scary thing is that I've heard similar stories several times before. The boys at the lab think that there is a new mutation appearing in the infected, something that reacts with the fire. Whatever it is, we need to get some samples so we can work out what's going on, and how we can go about fighting it. I've marked some locations where these creatures have previously been sighted. I want you to find one, kill it, and get a blood sample for our scientists to examine. Cash Reward:The value in brackets is the reward for Gold Members. $800 ($1600) |
| Map [[File:{{{Map}}}|center|650px]] |
| Walkthrough In this mission you need to retrieve a blood sample from a burning zombie's corpse. Be warned that the burning zombie is one of the 'boss' zombies in this game with a speed equal to that tendril and has 2500 health points. The burning zombies may spawn more than one at a time, if on multiplayer, so be aware. |
| The Rescue |
|---|
|
The Rescue Thanks for coming on such short notice. We just received a distress call from a small convoy of survivors. The radio signal was broken and fuzzy, but from what I could gather they had gone out scavenging for medical supplies when a group of the infected followed them back to their hideout. They are low on ammunition and have no other means of fighting off the infected. The panic in their voices and the screams in the background tell me they are almost out of time. The rest of my men are too exhausted from the raid last night to handle this rescue mission, so I'm counting on you to save these survivors and bring them back here. I traced the location of the radio signal, and I've marked it on your map. Please do what you can to save them. Cash Reward:The value in brackets is the reward for Gold Members. $800 ($1600) |
| Map [[File:{{{Map}}}|center|650px]] |
| Walkthrough The mission is quite simple. The survivor can be found in an industrial area in the top right corner of the marked area. Simply talk to her and kill the infected (20 kills required) until she says that the rest were killed when the infected broke through the barricades and that she'll return to the Holdout. A moderate level of aggro should be expected upon entering the area. |
| The Science |
|---|
|
The Science Our lead research scientists have just informed me that they are very near a breakthrough in a treatment for the beginning stages of the N4 virus in human hosts. They have already conducted preliminary tests on infected lab rats and select feline species with great success. They are now ready to begin testing on early stage human carriers. The problem we are facing now is that the scientists are low on lab supplies, and will need some more advanced equipment to continue their testing. Our scouts recently spotted some abandoned medical supply trucks that would most likely have the supplies and equipment we need. I want you to go scavenge these trucks and bring back everything on this list that you can find. I have marked the location of the supply vehicles on your map. Cash Reward:The value in brackets is the reward for Gold Members. $650 ($1300) |
| Map [[File:{{{Map}}}|center|650px]] |
| Walkthrough Loot three supplies trucks for medical supplies in the area indicated by map. Heavy aggro will begin while you are in the area; most likely after you have looted all the supplies. |
| The Clue |
|---|
|
The Clue We received a radio signal yesterday from a group of survivors who were looking for a safe haven. I gave them our location, and instructed them to follow a back-alley route through central Fairview. We expected them to arrive at the holdout yesterday afternoon, but they still haven't shown up and they are not responding to our radio alerts. I have a bad feeling about this one. I need you travel to their last known location, the source of yesterday’s radio signal, and search for any clues as to what might of happened to them. I've marked the location on your map. Cash Reward:The value in brackets is the reward for Gold Members. $900 ($1800) |
| Map [[File:{{{Map}}}|center|650px]] |
| Walkthrough Search for a video tape in the area indicated on the map. |
| The Search |
|---|
|
The Search A group of survivors that were due to arrive at the Holdout never showed. We went to look for them, but the only thing we found was a discarded video tape from a handheld camcorder. After studying the tape carefully my team and I have come to the conclusion that a few of the 16 survivors may have made it somewhere pretty close to us. My men and I will sweep north of the Holdout looking for them. I'd like you to search the blocks south of the Holdout. If you do manage to find anyone alive, get them back to safety asap. I've marked the search locations on your map. Cash Reward:The value in brackets is the reward for Gold Members. $650 ($1300) |
| Map [[File:{{{Map}}}|center|650px]] |
| Walkthrough Search for the 4 civilians in the map. There is one civilian in each area. If you see one, go near him/her until he/she finished talking. After talking to 4 civilians, the mission is complete. |
| The Cull |
|---|
|
The Cull We have a big problem. The infected usually wander past the holdout without paying too much attention. In the past few days I noticed that their population in this sector has been growing rapidly. I even noticed a few trying to climb the outpost walls and having chunks of flesh ripped off on the razor wire. They are becoming far more determined. None of them have breached the walls yet, but it’s only a matter of time. We need to dramatically cull the population of infected outside the Holdout. I'm going to take a team of my best men out and exterminate as many of them as I can. I'd like you to accompany us on this mission - the more firepower the better. We'll rendezvous at the location I've marked on your map. Cash Reward:The value in brackets is the reward for Gold Members. $800 ($1600) |
| Map [[File:{{{Map}}}|center|650px]] |
| Walkthrough This mission has 2 objectives, meet Nastya and the mercenaries and kill 100 infected. This mission can be difficult. However, Nastya and the mercenaries are armed with heavy weapons, so use them to bet your advantage to complete this mission. |
| The Analysis |
|---|
|
The Analysis During last night’s storm lightning struck our research lab, and the resulting power surge fried most of our computer equipment. We have some of the greatest minds in medical science and genetics working on a cure for the N4 virus, but the calculations and data analysis needed would take centuries without these machines. I've heard rumours of a crashed military helicopter that came down in the original uprising. Apparently it was carrying a cargo of high-end electronic equipment. I'd like you to go the crash site and retrieve any electronic parts you can find still intact. The approximate location is marked on your map. Cash Reward:The value in brackets is the reward for Gold Members. $750 ($1500) |
| Map [[File:{{{Map}}}|center|650px]] |
| Walkthrough Loot a helicopter in the marked area for electronic parts.Walk along the sidewalk on the southest part of the map and walk east |
Dogg's Stockade Missions
| The Pick Up |
|---|
|
The Pick Up I made an arrangement so to speak with the Red Fists, one of the other... uh... groups in the area. I sent Tony over to make the trade. Only, according to them, Tony got bit en route and so the RF had to finish him off. Maybe that's the truth, or maybe they just wanna keep the package and the money for themselves. They claim otherwise, but they ain't coming all the way here to make the delivery. Of course, I ain't no damn fool. These suckas have a lot to gain from my death, so I need someone else to go in my place... I've marked the location for the pickup on the map. I'd like you to go there and get my package. If those punks give you any trouble then you have my permission to wax them on the spot. Also, don't even think about taking a look inside the box. It's strictly... uh... confidential. Cash Reward:The value in brackets is the reward for Gold Members. $2000 ($4000) |
| Map [[File:{{{Map}}}|center|650px]] |
| Walkthrough The mission states that you have two objectives: meet up with the Red Fist gang and retrieve the package they are holding. The package and the gang will be located right outside the NW entrance of the area. To complete the first objective, simply haul it to the group of men and help them fight off the zombies that attack during aggro spikes. Between spikes, when things calm down and the gang stops shooting, they will start to talk to you. Once one of the members tells you to take the package and get lost, the first objective will be complete (marked by the objective turning green on the left of the screen). Now, simply walk up to the lootable van that is located right below the gang and your position (you'll see it once you reach the gang) and loot it. You will receive the package, and that's it! "Mission Complete" will appear at the bottom of the screen to mark your victory. Head back to Dogg's to claim your reward. |
| Need A Hand? |
|---|
|
Need A Hand? Sup man. My damn idiot of a brother just got his hand bitten clean off by one of those zombie chicks about a mile or so from here. The doc reckons he can probably reattach it if we can find it quickly enough. I know my brother, and I know losing his right hand is gonna be a fate worse than death, if you get my meanin'... I've marked the location where he lost it on you map. Go there and find his hand. I don't care if you have to gut every zombie chick in the area, just find it. Cash Reward:The value in brackets is the reward for Gold Members. $2300 ($4600) |
| Map [[File:{{{Map}}}|center|650px]] |
| Walkthrough Find Dogg's brother's severed hand. To complete this mission you need to go to the highlighted area and loot the severed hand off the corpse of a naked female zombie you kill. It is recommended to use silent weapons such as Melee Weapons in order to keep the aggro low. |
| It's Spreading |
|---|
|
It's Spreading Aww sh*t. The doc reattached my bro's hand, but somethin' happened. He started gettin' sick, high fever, delusions, sores appearin' all over his goddamned body. That damn hand was infected! Sure enough, he's infected too by the looks of it. Anyhow, he's damn pissed. I talked to one of our science geeks and he thinks we might be able to halt the change if we can get the right combination of drugs into to his body quickly enough. Of course we don't have what we need. I've marked a location on your map where our science dudes think you might be able to find these drugs. Probably be hidden in some supply trucks or somethin'. Go there and get the sh*t so we can fix my bro up. Cash Reward:The value in brackets is the reward for Gold Members. $2500 ($5000) |
| Map [[File:{{{Map}}}|center|650px]] |
| Walkthrough Find 5 bottles of Chemicals and bring them back to Dogg's Stockade. They can be looted from trucks in the designated areas. |
| Big Brother |
|---|
|
Big Brother Are you kiddin' me? That damn cocktail of drugs didn't help my bro at all. The infection kept getting worse, his skin went all red and bits of extra bone started growing all over his damn body! He's mutatin' into a goddamn beast! A few minutes ago he went into a fit of rage and ran off into the streets. I hate to say this, but we're gonna have to put my bro down. Last thing we need is a mutated beast runin' around the place. Also, he's got the key to my... uh... well... let's call it storage. I reckon he's gonna be somewhere near the place I just marked on your map. Go there, take him down, and get my damn key back! Cash Reward:The value in brackets is the reward for Gold Members. $2700 ($5400) |
| Map [[File:{{{Map}}}|center|650px]] |
| Walkthrough The mission instructs you to kill a Titan and loot it for a Rusty Key in the designated area. The Titan is a very powerful creature for survivors at the Stockade, so make sure to bring a lot of firepower, friends and ammo to kill the creature. |
| Flamin' Stenches |
|---|
|
Flamin' Stenches Hey buddy, got a little job for ya. Lookout just spotted a group of 4 flamin' stenches hanging around a few blocks away. I don't think I need to tell you that those guys are bad news. I don't want those fire spreadin' bastards anywhere near my damn stockade! I've marked the locations they were last seen on your map. I want you to go there and take those damn zombies out. Cash Reward:The value in brackets is the reward for Gold Members. $2200 ($4400) |
| Map [[File:{{{Map}}}|center|650px]] |
| Walkthrough The objective of this mission is to eliminate four burning infected in the designated area. Shortly after entering the area, several burning zombies will appear. While not impossible, engaging the whole group can be very challenging, especially for inexperienced survivors. A good strategy is to trap the group behind a fence or wall and eliminate the enemies one by one. |
| Fix 'em Up |
|---|
|
Fix 'em Up Some of the folks here figure they have a better chance at stayin’ safe if they leave the outpost and head out to live in the sticks. I think they’re damn fools, but I ain’t gonna stop ‘em. Problem is, we only have a few workin’ trucks left here at the Stockade. They’re gonna need some working vehicles if they want a chance of surviving this trip. I sure as hell ain’t giving them any ours though. We need them here for ourselves! Those crazy bastards will probably all end up as zombie sh*t within a couple days anyway. So... a couple of my boys told me that they seen some abandoned trucks around the city when they was out hunting zombies the other night. I need you to go collect some engine parts so we can get their vehicles up and running again. I marked all of them on your map for ya. Cash Reward:The value in brackets is the reward for Gold Members. $2500 ($5000) |
| Map [[File:{{{Map}}}|center|650px]] |
| Walkthrough Collect 7 Machine Parts from abandoned vehicles in the highlighted area. Not all vehicles can be looted with Machine parts. Expect a bit of aggro during the search. The beautiful part about this mission is that there will be no reapers, bones and sirens, although there will be a few bloats that you'll passed by when you complete the mission. |
| Suck On This |
|---|
|
Suck On This I swear that some of these people must think I’m their Daddy. They can’t do a damn thing for themselves! So this here is the deal. These dummies are planning to head out to the sticks to live, figuring they can avoid the infected better out there. They got some workin’ vehicles, but they ain’t got gas. You’d think they would’ve mentioned that before now, right? It was funny as hell watching ole’ dumbass Hank turnin’ the key in the pickup and wondering why it still wouldn’t crank up! Ha Ha! Well they ain’t going nowhere till they have some gas for the vehicles. There are vehicles all around here with gas that you can syphon. Just stick a tube in there and suck on it until the gas flows out. Shouldn’t be too hard for ya, I figure you’ve had plenty of practice at that sorta thing right? Ha! I’m just pullin’ yer chain buddy. I marked the best locations to look for vehicles on yer map, get to it. Cash Reward:The value in brackets is the reward for Gold Members. $2600 ($5200) |
| Map [[File:{{{Map}}}|center|650px]] |
| Walkthrough To complete this mission, you have to syphon 7 fuels from the abandoned vehicles in the highlighted area just a few blocks above Doggs Stockade. This mission is pretty simple to complete. Note that not all vehicles will be looted with fuel. This mission is located just 3 blocks above the outpost, but all zombies, including the special and the mutant ones, are present in this mission. |
| That's My Map |
|---|
|
That's My Map I told them (fools) that leaving the Stockade was a bad idea. I reckon they’re all either infected or in piles of zombie turds by now. They didn’t even make it out of the city before we got a distress call on the radio. Sounds like the infected were yanking em’ out of their vehicles and gnawing meat off their bones like chicken wings! I don’t figure any of em’ are still alive at this point. Shame... there were some fine-ass ladies in that bunch too. Anyhow, they took the best map we had of the outskirts of town, and didn’t have the decency to even leave us a damn copy. I need you to go retrieve the map for me. I marked the last location of their convoy on your map. Cash Reward:The value in brackets is the reward for Gold Members. $2100 ($4200) |
| Map [[File:{{{Map}}}|center|650px]] |
| Walkthrough Retrieve the map from the highlighted area. Can be looted off a dead corpse. The map is easily found. |
| Scotty Boy |
|---|
|
Scotty Boy So we were all downstairs drinking and doing our thing, when my boy Scott decided he was gonna take his motorcycle out for some shotgun zombie-blasting. Now that sh*t ain’t completely unusual for him to do. He’s damn talented on a bike, and even better with a sawed-off shotgun... but he was pretty well lit off the booze. I’m surprised he could even ride out of here. He should’ve been back ‘bout an hour ago. I got a bad feelin’ that his liquid courage might’ve gotten him in a bad situation. He’s been riding with us for years; I hope like hell he ain’t gone and got himself killed. He usually heads to the same place, sayin’ it’s a prime zombie stompin’ ground. I need you to go find his drunk ass and bring him back before he passes out and becomes a zombie burger. I’ve marked the location for ya on your map. Cash Reward:The value in brackets is the reward for Gold Members. $2300 ($4600) |
| Map [[File:{{{Map}}}|center|650px]] |
| Walkthrough Kill a burning zombie and loot its corpse for a wallet. Be aware that there will be very high amounts of aggro in the marked area, even on single player. |
| Sickle Armed Bastards |
|---|
|
Sickle Armed Bastards Got a radio message from Nastya earlier today. Apparently her science nerds over at the Holdout are trying to research some of the more advanced infected mutations. Ain't many of those bastards down where she is, so she's asking us to collect some Reaper blood for them. Yeah... those are the crazy looking, mutated sickle armed bastards. That’s them alright. Nastya ain't the hottest pieces of ass ever, but pickings are pretty damn slim these days so I'll take what I can get. So, I'm inclinded to help her out. Ha ha! Go collect some blood samples for her. I marked right where you can find ‘em on your map. Just watch out for those sharp arms, they hurt like a b*tch! Cash Reward:The value in brackets is the reward for Gold Members. $2450 ($4900) |
| Map [[File:{{{Map}}}|center|650px]] |
| Walkthrough Kill 6 reapers and loot the blood samples. It is highly recommended to use long-ranged weapons as reapers attack 2x the range of a melee weapon. It should be warned that multiple reapers will spawn, even on single player, so a crowd control weapon is recommended. |
| Bones |
|---|
|
Bones We got a big damn problem now. I know you seen them spiny looking bastards with the big sharp bones poking out everywhere, right? Well we are about to get all up-close and personal with a whole slew of ‘em. Slate was just out taking a cruise on his bike and said that he saw a big group of ‘em headed straight toward my Stockade. This sh*t ain’t cool at all. I ain’t seen Slate actin nervous before, but he sure was shook up when he got back. We got women and children in here, and I like to keep them as far from the killin’ as possible. I need you to go and kill the hell out of this group of advancing Bones. Don’t let them get anywhere near the Stockade if you can help it. I’ve marked where they should be on your map. Cash Reward:The value in brackets is the reward for Gold Members. $2350 ($4700) |
| Map [[File:{{{Map}}}|center|650px]] |
| Walkthrough Kill 30 Bones in the highlighted area. Make sure to bring lots of ammo and friends for this mission. Bones will start spawning in an enraged state and in large amounts at once. |
| That Damn Noise! |
|---|
|
That Damn Noise! You hear that damn high pitched sort of screaming in the distance? It sounds like a bunch of those two-headed infected ladies, we call ‘em Sirens. Something must have gotten ‘em all riled up cause they’ve been screaming for an hour now, and I can’t listen to their sh*t any more. As far as I know, the Sirens ain’t never hurt anyone themselves, other than interrupting my damn sleep. Problem with them is that all the other infected are drawn to that horrible screeching, so if you piss ‘em off then you better expect company. Anyhow I’d really like to get some sleep tonight... I need you to go shut those b*tches up for good. I can hear the direction of the noise, and I’m pretty sure I know where they’re at. I've marked the location on your map. Cash Reward:The value in brackets is the reward for Gold Members. $2750 ($5500) |
| Map [[File:{{{Map}}}|center|650px]] |
| Walkthrough Kill 25 Sirens in the marked area. This mission is quite difficult as the sirens will scream and attract massive hordes. In order to finish this mission easily, go to the field on the bottom-left. Go and stay there until you find sirens and a little group of zombies. With this strategy, you can easily kill the sirens without having too much aggro behind. |
Precinct 13 Missions
| End Their Suffering |
|---|
|
End Their Suffering How's it going? I've got a job for you if you're interested. Listen, back in the days before all this kicked off the men and I were pretty close with the boys down at Fairview Precinct No.5. Soon after the outbreak we lost all contact with them and feared the worst. Recently one of our patrols spotted a large group of infected in blue uniforms wandering through the city. They moved in for a closer look and recognized them right away. Looks like the guys from Precinct 5 weren't as lucky as us and have fallen prey to the virus. That's not a life worth living, and I reckon we owe them a quick end to their suffering. I've marked the location where the patrol spotted them on your map. I'd like you to head over there and put as many of them out of their misery as you can. Cash Reward:The value in brackets is the reward for Gold Members. $8000 ($16000) |
| Map [[File:{{{Map}}}|center|650px]] |
| Walkthrough Chief Jackson tells you that the police department "Precinct 5" were not so lucky and that you must put to rest the infected police officers from that department. Thus you must kill 250 police officers in a marked area on the city map. Expect high aggro. Location Map: http://deadfrontier.wikia.com/wiki/File:P13_End_Their_Suffering.jpg |
| Family First |
|---|
|
Family First As I'm sure you heard, my wife Charlotte went missing a few weeks ago. She was suffering from severe depression and I guess it just got the better of her. I woke up one morning to find her gone. She left a note asking me not to come after her. Of course I didn't listen. My boys have searched everywhere for her but so far they didn't find anything. Anyway, I literally just remembered something she said the night before she left. She kept talking about getting this photo of our daughter Sabrina framed. There was a little printers just a few blocks from here we always used to go to for stuff like that. Maybe she went there? Please go to the location I've marked on your map and see if you can find any trace of her. Cash Reward:The value in brackets is the reward for Gold Members. $7500 ($15000) |
| Map [[File:{{{Map}}}|center|650px]] |
| Walkthrough Chief Jackson tells you that his wife has gone missing and asks you to find a trace of her. Thus you must find a clue around the 4 blocks. Looking for the photo is hard since high aggro is common. Location Map: http://deadfrontier.wikia.com/wiki/File:P13_Find_sabrina.jpg |
| Find Sabrina |
|---|
|
Find Sabrina No! I'm such an idiot! Why did I have to tell her? What have I done? Argh... I'm sorry for my outburst, but I think I'm losing it. Like a fool I told Sabrina about the photo, and about how her mom might still be alive. Big mistake. She got all upset and wanted to go looking for her right away. I tried to explain to her that we had to wait for the men to get prepared, but she wouldn't listen! Now look what's happened! She's run off too! The only two people I have left in this world, gone... Please, PLEASE, you have to find her! I can't lose her too! She must have gone to the place where the photo was found. I've marked it on your map. Please hurry! She is only a little girl... Cash Reward:The value in brackets is the reward for Gold Members. $8000 ($16000) |
| Map [[File:{{{Map}}}|center|650px]] |
| Walkthrough The goal of this mission is the retrieve Sabrina's body and bring it back to the Precinct. Similarly to the "Family First" mission, lootables in the areas highlighted on the map have to searched in order to find the body. During the search, aggro will be high, making it hard to loot. Location Map: http://deadfrontier.wikia.com/wiki/File:P13_Find_sabrina.jpg |
| Revenge |
|---|
|
Revenge Those bastards have taken everything from me! They've ruined my life, my career, killed my men, and now they've taken away what's left of my family! Well, I'm not gonna stand for this. I'm gonna kill every last one of these infected scum! They are going to pay for what they've done... I know, I know, I'm not thinking clearly right now. But I don't care! I need revenge! Of course I can't ask my men to risk their lives just so I can take out my anger. I don't expect you to risk yours either, but if you did want to come along for the ride... well there's a big pile of cash in it for you. If you do want in, meet me at the location I just marked on your map and we'll exterminate these bastards together! Cash Reward:The value in brackets is the reward for Gold Members. $8500 ($17000) |
| Map [[File:{{{Map}}}|center|650px]] |
| Walkthrough To complete this mission you need to meet up with Chief Jackson in the highlighted area and help him exterminate 1000 infected. Be sure to carry a lot of ammo and a decent crowd control weapon, as the aggro can be very severe at times. Chief Jackson uses a shotgun with decent knockback, which you can use to your advantage. Location Map: http://deadfrontier.wikia.com/wiki/File:P13_Revenge.jpg |
| Find Charlotte |
|---|
|
Find Charlotte I can't believe it! My wife Charlotte is still alive! One of our patrols spotted her not too far from here. Unfortunately they weren't able to reach her before she ran off again. I'm mounting another operation to find her. My men and I are going to split up and search the east of where she was spotted. I'd like it if you could tag along and check out the western side, we can use all the help we can get. I've marked the location on your map. Please go there and help us find her! Cash Reward:The value in brackets is the reward for Gold Members. $8000 ($16000) |
| Map [[File:{{{Map}}}|center|650px]] |
| Walkthrough Chief Jackson asks you to find his wife - Charlotte. She can be found in the area highlighted on your map, wielding a rifle. Once found, she will talk to you a couple of times before the mission is completed. During that time expect high aggro. Location Map: http://deadfrontier.wikia.com/wiki/File:P13_Find_Charlotte.jpg |
| Battery Acid |
|---|
|
Battery Acid Our squad cars are especially valuable for us because they have puncture resistant tires and bulletproof glass. The sirens and lights also seem to be somewhat disorienting for some of the infected. We have been running the vehicles frequently since the original outbreak, and the batteries in them are deteriorating. These police vehicles use a unique type of battery, so we are unable to use the ones from our personal vehicles. Sadly, many of my men were lost during the original outbreak, and many of their vehicles were disabled in the fighting. However, the batteries are still likely to be completely functional. Please go to the locations marked on your map and retrieve the batteries from these abandoned police vehicles. Cash Reward:The value in brackets is the reward for Gold Members. $8250 ($17000) |
| Map [[File:{{{Map}}}|center|650px]] |
| Walkthrough You have to retrieve 10 Batteries from police cars in the marked location. Each battery occupies 1 inventory space so clear your inventory before going out. Location Map:http://deadfrontier.wikia.com/wiki/File:P13_Battery_Acid.jpg |
| Communication Is Key |
|---|
|
Communication Is Key I’ve got some terrible news. Miles and Smith were out on a routine patrol when I received a distress call from them over the 2-way radio. I sent another patrol car to ride out and help them, but it was too late. Those boys were being torn to pieces... There was nothing we could do for them. I ordered the others to abandon the rescue and return to the station. However, there is a police radio in the abandoned squad car that we need to retrieve. Those radios are incredibly valuable to our patrols and the safety of our men, and are in pretty short supply. I need you to go retrieve the radio from this squad car and bring it back to the station. I’ve marked the location of the squad car on your map. Cash Reward:The value in brackets is the reward for Gold Members. $8000 ($16000) |
| Map [[File:{{{Map}}}|center|650px]] |
| Walkthrough You have to get a radio from a police car in the marked map. Just one. Location Map: http://deadfrontier.wikia.com/wiki/File:P13_communication_is_the_Key.jpg |
| Tendril Strike |
|---|
|
Tendril Strike A patrol just contacted me over the radio to report a horde of tentacle mutantations rapidly approaching the precinct. I’m not sure if these “Tendrils” are just wandering, or if they have targeted our base for an attack. Honestly, I don’t intend to wait and find out. I’m not sure if you’ve dealt with these ladies before, but they are no joke. They are very fast, and have quite a long range with those tentacles. I’ve always kept my distance when dealing with them in the past. I have marked the location they were spotted on your map. Please destroy them all before they arrive here. Cash Reward:The value in brackets is the reward for Gold Members. $7000 ($14000) |
| Map [[File:{{{Map}}}|center|650px]] |
| Walkthrough You need to kill 50 "Tendrils" at the marked location. Make sure to being some friends and some ammo, there will be moderate to high aggro around the area. Multiple Tendrils will spawn at a time and are quite fast. Location Map: http://deadfrontier.wikia.com/wiki/File:P13_tendril_strike.jpg |
| Officers Down |
|---|
|
Officers Down We have an urgent situation I need to discuss with you. About an hour ago I sent out 4 men to collect some general medical supplies that are needed here at the station. Unfortunately, they didn’t get very far before a large horde of the infected blocked the street and surrounded them. It’s only a matter of time before the men are turned into luncheon meat. I told my boys to hold tight, and not leave the cars unless they were forced to. They have some weapons and ammunition, but with a horde that size on all sides, it appears unlikely they can fight their way out. I need you to go exterminate these creatures and relieve my men before it's too late. I have marked their last reported location on the map. Cash Reward:The value in brackets is the reward for Gold Members. $7750 ($15500) |
| Map [[File:{{{Map}}}|center|650px]] |
| Walkthrough Go to the marked area, there will be high aggro. You need to exterminate 500 zombies and talk to 4 police officers. Be wary, the officers will leave after you talk to them. It's ideal to bring a lot of ammo and some friends along. Location Map: http://deadfrontier.wikia.com/wiki/File:P13_officers_down.jpg |
| Itchy Scratchy |
|---|
|
Itchy Scratchy As you may have heard, our lead Research Scientist, Dr. Adler, has gone missing. He was heading up the research work for a treatment for the early stage infected. They have been running human trials, and I was under the impression they were very near a breakthrough in the research. Adler disappeared around noon yesterday, and left no message nor spoke to anyone regarding his departure. One of my men spotted him heading up the road on foot, and I’m concerned that he could be in great danger. If he’s had some sort of mental breakdown, we need to get him back ASAP. I’ve marked an area on your map where he was last seen. Please go find him, and bring him back, by force if necessary. If he has had some sort of mental breakdown, then he may not be cooperative. Cash Reward:The value in brackets is the reward for Gold Members. $8250 ($16500) |
| Map [[File:{{{Map}}}|center|650px]] |
| Walkthrough Find Dr Adler in the marked area. He can be found alive anywhere in the area. Stay near him until he finished talking. Location Map: http://deadfrontier.wikia.com/wiki/File:P13_itchy_scratchy.jpg |
| Blood Harvest |
|---|
|
Blood Harvest Our scientists believe that they have developed a vaccine that can prevent the cell mutation that causes an infected human female to grow those nasty tentacles that have been cropping up lately. Preventing these dangerous mutations would make the task of defending the precinct far easier. Unfortunately they are running low on test samples back at the lab and they have asked me to secure more for them. Unfortunately my own men don't have the skill set required to collect these samples. Therefore I need you to travel to the site marked on your map, and to collect blood samples from several of the tentacle women on our behalf. Cash Reward:The value in brackets is the reward for Gold Members. $8100 ($16200) |
| Map [[File:{{{Map}}}|center|650px]] |
| Walkthrough Go to the marked area. Collect 10 blood samples from tendrils. Expect high aggro. Bring friends or good crowd control weapons. Many tendrils will spawn at one time and not all will be lootable. Make sure you have 10 open inventory spots. Location Map: http://deadfrontier.wikia.com/wiki/File:P13_blood_harvest.jpg |
| Tentacles Everywhere |
|---|
|
Tentacles Everywhere Yesterday I sent out a couple men to exterminate what I thought was a normal tentacle woman. Evidently a new mutation is occurring, because this one was huge! The damn thing ripped their car in half in one swing! The boys at the lab need a blood sample to try and understand why this mutation is occurring, and to help us find a way to stop it. This isn’t going to be an easy mission for anyone, but it has to be done. If these things keep mutating like this we may become unable to fight them with our current weaponry. I’ve marked the location of this creature on your map. Get over there and get that blood sample. I’m going to round up some of my best men, and we will meet you there to assist. Cash Reward:The value in brackets is the reward for Gold Members. $8400 ($16800) |
| Map [[File:{{{Map}}}|center|650px]] |
| Walkthrough You need to kill a Wraith with Chief Jackson, expect high aggro. Location map: http://deadfrontier.wikia.com/wiki/File:P13_Tentacles_everywhere.jpg |
| Find Jim |
|---|
|
Find Jim It seems that one my men have gone missing. Trey and his partner Jim were searching an abandoned apartment building for survivors when they were attacked by a group of the infected. They were evidently forced to split up, and Trey arrived back at the station on foot. His report was that the pressure from the infected was overwhelming, and after losing sight of his partner he had been forced to retreat. One of our spotters on the roof just saw a man in a blue police uniform running out of a building up the road. I need you to go look for him, and bring him back if he’s still alive. I have marked the location he was last seen on your map. Cash Reward:The value in brackets is the reward for Gold Members. $7000 ($14000) |
| Map [[File:{{{Map}}}|center|650px]] |
| Walkthrough Go to highlighted area of map. Find a corpse of a cop and search him for an I.D. tag. Return to P13 and you're done. However, be cautious for this mission is in the end zone, even though there is no aggro unless a player causes it. Location Map: http://deadfrontier.wikia.com/wiki/File:P13_find_Jim.jpg |
| Mow Them Down |
|---|
|
Mow Them Down Although it’s not unusual to see infected occasionally wander past the Precinct, there has lately been a steadily growing population in the area. One of my patrol cars reported plowing over tons of them just a few blocks away yesterday. It was quite a mess trying to pressure wash all the internal organs and blood out of the grill of their car! Anyway, it’s making me nervous that the population is growing so rapidly this close to our precinct. I think it’s time that we took a group of officers out to cull their population before they turn their attention toward us. It would be great if you could give them a hand. I have marked areas on your map where you will find high populations of the infected. I have assigned you some of my best guys, and they are looking forward to a little zombie free-for- all. They'll meet you there. Cash Reward:The value in brackets is the reward for Gold Members. $7300 ($14600) |
| Map [[File:{{{Map}}}|center|650px]] |
| Walkthrough You have to meet with the police officers and kill 750 infected to complete the mission. Expect High aggro. Location Map: http://deadfrontier.wikia.com/wiki/File:P13_mow_them_down.jpg |
| Scream Away |
|---|
|
Scream Away Have you heard those horrible screams in the evening? Well you may know this already, but those are the Sirens; nasty two headed creatures. They aren’t too dangerous alone, but if they see you they’ll scream and attract every other creature in the vicinity. Our boys at the lab have developed a virus that they believe will attack their vocal chords and cause them to become mute. It’s completely harmless to the non-infected. We are hoping to cut off their communication this way without actually having to find them all first. In order to continue their research, the scientists need some fresh blood samples from the Sirens. Go to the location I have marked on your map and get those blood samples ASAP. Cash Reward:The value in brackets is the reward for Gold Members. $8050 ($16100) |
| Map [[File:{{{Map}}}|center|650px]] |
| Walkthrough You need to get 10 Blood samples from Sirens in the area. Expect High aggro. Each blood sample occupies 1 space so clear your inventory before trying the mission. Location Map: http://deadfrontier.wikia.com/wiki/File:P13_scream_away.jpg |
| Fear The Reaper |
|---|
|
Fear The Reaper We have a major problem friend. See that table over there? Those two pistols are all that’s left of this morning’s patrol. You’re right... it didn’t go very well. A horde of scythe armed freaks are approaching the Precinct, and they are approaching very fast. My men tried to draw them away, and they managed to buy us a little time, but they paid for it with their lives... We must act now if we are going to avoid a full out assault on our precinct. The women and children living here have already been exposed to enough horror to last a lifetime. I need you to head out and eliminate this horde of Reapers before they get here. I have marked their current location on the map. Good luck. Cash Reward:The value in brackets is the reward for Gold Members. $7800 ($15600) |
| Map [[File:{{{Map}}}|center|650px]] |
| Walkthrough You have to kill 100 Reapers in the Highlighted area expect high aggro. There is a tennis court with a large fence on the southest road it can help. Location Map: http://deadfrontier.wikia.com/wiki/File:Fear_the_reaper.jpg |
| Infection |
|---|
|
Infection Some sort of infection has broken out within the precinct. Luckily, it doesn’t seem to be related to the N4 virus. However, with such close living quarters many of the more older residents and children have fallen very ill in a short space of time. I just ordered a temporary quarantine of the sick in the back of the building until we can get the necessary medical supplies for treatment. I fear that if we don't get some anti-biotics soon half the precinct could be dead within a month. I would like you to go scavenge through some of the abandoned medical trucks that I’ve marked on your map, and bring back whatever you can find. Cash Reward:The value in brackets is the reward for Gold Members. $7900 ($15800) |
| Map [[File:{{{Map}}}|center|650px]] |
| Walkthrough You need 10 medical supplies which can be looted from small van in the area highlighted. Expect high aggro. Each medical supply occupies 1 inventory space so clear your inventory before going. Some trucks can be re-looted if you exit the block and return. Hint: Hold E while walking around the van to loot it. Location Map: http://deadfrontier.wikia.com/wiki/File:P13_infection.jpg |
| The Lost Pendant |
|---|
|
The Lost Pendant I've got a personal favor to ask of you. My daughter recently passed away in a tragic accident, and the only photo my wife has left is in a small necklace pendant, and she is traumatized at the loss. All she does now is lie in the bed and cry all day, or stare off into space when I try to confront her. Would you be willing to retrieve her necklace for me? I would do it myself, but I'm afraid to leave her alone in this condition. I don't know what she might do to herself is she has any more stress now... It would really mean a lot to me if you could go retrieve her pendant and bring it back to the precinct. I have marked the location where she believes she lost it on your map. Cash Reward:The value in brackets is the reward for Gold Members. $6000 ($12000) |
| Map [[File:{{{Map}}}|center|650px]] |
| Walkthrough You need to go to the highlighted area to loot a Pendant off a dead corpse. You may expect some aggro during the search. Location Map:http://deadfrontier.wikia.com/wiki/File:P13_lost_pendant.jpg |
Fort Pastor Missions
| War Machine |
|---|
|
War Machine Soldier! See that tank sitting outside? It's a useless heap of junk. She doesn't do anything but lay on her back and look pretty. Well, this ain't no freaking prom night for heavy artillery! We need that war machine back in action ASAP if we're going to wax these infected sons of a b*tch. I've got the best damn engineer in Fairview working on her right now, but he simply hasn't got enough parts to finish the job. During the first week of the apocalypse, a convoy of military vehicles carrying various supplies and machine parts was sent in. Unfortunately they never made it to the Fort. This is where you come in soldier. I want you to head over to the location I've marked on your map and retreive 10 sets of machine parts from those military vehicles. Cash Reward:The value in brackets is the reward for Gold Members. $11000 ($22000) |
| Map [[File:{{{Map}}}|center|650px]] |
| Walkthrough Collecting the 10 Machine Parts is almost just the same as the collecting fuel cans mission - you need to loot army trucks in the designated areas. Location Map: http://deadfrontier.wikia.com/wiki/File:War_Machine.jpg |
| Pinned Down |
|---|
|
Pinned Down Soldier! One of our patrols just got hit by a massive horde of those infected bastards. The men have just about managed to stand their ground so far, but they're rapidly getting tired and running out of ammo. If we don't intervene soon they simply aren't going to make it. Believe me, the last thing I want is for some of the toughest badasses in this battalion to get splattered across the pavement. I've marked their location on your map. I want you go there, relieve the men and cover their retreat by killing as many infected as you can. I suggest you get a move on! Cash Reward:The value in brackets is the reward for Gold Members. $10500 ($21000) |
| Map [[File:{{{Map}}}|center|650px]] |
| Walkthrough Get to the designated area, talk to 4 soldiers and kill 750 infected. Heavy aggro surrounds the area, and the soldiers will leave as soon as they talk, so don't try to rely on them to complete the mission. Location Map: http://deadfrontier.wikia.com/wiki/File:Pinned_down.jpg |
| The Spiders |
|---|
|
The Spiders Soldier! As I'm sure you're aware, I loathe spiders. I mean I f***ing HATE their spindly, scraggly, skulking excuse for an existence. Those bastards give me the goddamn creeps, and I'm the kind of guy who'll happily wrestle a shark before breakfast. So, imagine my dismay when I learn that these infected sons of a b*tch have started mutating into something very much resembling an arachnid. I'm getting the egg heads on board to find a new way to combat them. There might be something they can do, but they're going to need samples; a lot of samples. Sounds like your kind of thing to me. I've marked an area on your map that we've pin pointed as being highly concentrated with these bastards. I want you to get your ass up there, extract 10 blood samples from their corpses and bring them back to the lab ASAP. Cash Reward:The value in brackets is the reward for Gold Members. $10000 ($20000) |
| Map [[File:{{{Map}}}|center|650px]] |
| Walkthrough Collect 10 Blood Samples from Spiders. Blood Samples are in the areas highlighted on your map. A good tactic to avoid the large amounts of aggro is to outrun it by running around the edges of the map. Another good tactic is to find trap points where there's no direct entrance point, and zombies can only come in on your favor. Location Map: http://deadfrontier.wikia.com/wiki/File:The_Spiders.jpg |
| Where The Hell Is He? |
|---|
|
Where The Hell Is He? Soldier! Just when I thought we'd have our tank on the road our chief engineer disappears! This son of a b*tch is pretty much the only person in this stinking hell hole of a city who might be able to get our artillery back in action! We need his ass back here on the freaking double! The men say he was off his face on booze last night and was babbling about going to see his family. They were slaughtered two weeks ago while en route to Nastya's Holdout. My best guess is he's headed towards the place where they died. I've marked the location on your map. Go there and bring that crazy bastard back to the Fort ASAP, assuming he's still alive that is! Cash Reward:The value in brackets is the reward for Gold Members. $10000 ($20000) |
| Map [[File:{{{Map}}}|center|650px]] |
| Walkthrough The missing man mission is actually quite easy. Some players suggest buying 4,000 rounds of ammo and using an automatic gun. However, if you don't have an aggro-clearing weapon, you can still drive away the horde (temporarily) by circling throughout the area.Once you enter the area, you will be attacked with high aggro - all kinds of zombies, from common infected to leapers and bloats. Jenkins can be found alive in any part of the area, just stay near him, help him kill aggro and let him talk.His last word will be "I'll catch you later". Location Map: http://deadfrontier.wikia.com/wiki/File:Where_The_Hell_Is_He.jpg |
| One Big Ass Spider |
|---|
|
One Big Ass Spider Soldier! The egg heads have made some progress in their 'spider studies' but are now b*tching about needing more samples. Only this time, they ain't interested in those dinky little ones. Oh no, they reckon the key to finding a weakness is only going to be found in an extremely advanced stage of mutation, or some other sci-fi nerd BS to that effect. In simple terms, that means they need the blood from one big ass spider, and I sure as hell ain't doing it. Since sh*t rolls down hill around here, it looks like you're the one for the job. The egg heads gave me some possible locations for just such a spider, which I've marked on your map. Go find that giant bastard, put a cap in it's ass, and get me that damn blood sample ASAP. Cash Reward:The value in brackets is the reward for Gold Members. $13500 ($27000) |
| Map [[File:{{{Map}}}|center|650px]] |
| Walkthrough The mission for the giant spider is a little trickier, once you get into the area marked on your map, make a lot of noise, and kill the giant spider. Beware, as it is common for more than one spider to show up, so bring a lot of friends and/or ammo. Once you get a lootable corpse, you can loot it for the blood sample. Location Map: http://deadfrontier.wikia.com/wiki/File:One_big_Ass_Spider.jpg |
| Tanks Get Thirsty Too |
|---|
|
Tanks Get Thirsty Too Soldier! Luckily, that bastard Jenkins is almost done fixing our tank. That's the good news. The bad news is that she guzzles more fuel than a fat man at an all you can eat buffet! In case you hadn't noticed, we don't have a whole lot of the good stuff available right now. We've already syphoned the tanks of just about every vehicle within a mile radius of the Fort. We're going to need to look much further a field this time. I've marked some locations where there may still be some fuel available. I want you to go there and get me 10 canisters from various vehicles that still have fuel in their tanks. That should be enough to get her going long enough for a test drive at least. Cash Reward:The value in brackets is the reward for Gold Members. $12000 ($24000) |
| Map [[File:{{{Map}}}|center|650px]] |
| Walkthrough Collecting the 10 gasoline cans is relatively easy. The only problem with this mission is that it takes a long time, just walk around the areas marked on the map and loot all vehicles you see. Vehicles can be relooted again when you entered the same area you've already looted. Aggro can be high. Location Map: http://deadfrontier.wikia.com/wiki/File:Tanks_Get_Thirsty_Too.jpg |
| Spiders, Spiders Everywhere! |
|---|
|
Spiders, Spiders Everywhere! Soldier! What the hell do they think this is? Some kind of god damn holiday camp? I've given those damn egg head bastards everything they need and this is the thanks I get? Apparently their tests are 'inconclusive' and they need 'more time'? Just exactly what brand of bullsh*t is this? I need these arachnid freaks out of my damn hair... RIGHT NOW! That's it, I've had enough. I'm declaring all out war on these bastards! I'm taking my best men and we're going to slaughter as many of these spindly spider f*ckers as we can! My men and I will be at the location I marked on your map. I expect you to show up and help the fight against these mutated freaks. Cash Reward:The value in brackets is the reward for Gold Members. $12000 ($24000) |
| Map [[File:{{{Map}}}|center|650px]] |
| Walkthrough The goal of the mission is to meet up with The Commander in the middle of the area and kill 250 spiders. Beware those who are low level or poor, this mission is very difficult. However, the commander has a minigun, and is accompanied by 2 soldiers with an Assault rifle and an auto shotgun, so use them to the best of your advantage if you need to. Location map: http://deadfrontier.wikia.com/wiki/File:Spiders,_spiders_everywhere.jpg |
| Engage! |
|---|
|
Engage! Soldier! I've got something I want to discuss with you, but it had better stay between you and me. If this sh*t get's leaked to ANYONE I'm gonna rip you a new one. Got it? Well... there's this lady officer I've been courting recently and... Hell, life is too damn short these days to be messing around. I want to get engaged damn it! Only trouble is I'm gonna need a ring, and not just any old ring, it'd better be damn impressive. I want you to go find one for me. I've marked the location of one of those posh neighborhoods on your map. Go there and find me the biggest diamond you can. One of those deceased upmarket snobs is bound to have one. Cash Reward:The value in brackets is the reward for Gold Members. $11000 ($22000) |
| Map [[File:{{{Map}}}|center|650px]] |
| Walkthrough The way to complete this mission is simple, and, like the title suggests, it involves looting. All the player has to do in order to complete this mission is simply go to the designated part of the map, loot a ring off a female dead corpse, and return to fort pastor. However, this can be very challenging, as aggro is plentiful, thus, hindering looting abilities of even the most experience veterans.. Despite the constant aggro, players with the right amount of equipment, and experience, can complete this mission. Location Map: http://deadfrontier.wikia.com/wiki/File:Engage.jpg |
| Big Bang |
|---|
|
Big Bang Soldier! I'm guessing you heard that ground shaking explosion last night? That was the North Fairview Powerstation going up in flames, along with several 100 infected that were nearby at the time. The only trouble is that the fire has set off a genetic mutation making them far more agressive and dangerous than they once were. Not to mention, totally immune to the fire itself. Our lookouts have spotted a large group of these burning sons of b*tch heading directly towards the Fort. We can't have them up here, burning up all our sh*t! I've marked their location on your map. Go there and destroy as many as you can before they get here. Try not to get barbecued while you're at it! Cash Reward:The value in brackets is the reward for Gold Members. $12000 ($24000) |
| Map [[File:{{{Map}}}|center|650px]] |
| Walkthrough Exterminate 15 burning zombies in the marked area and return to the outpost. Shortly after entering the area, burning zombies will start spawning. Engaging the whole group can be a daunting task, especially since if one of the enemies goes off screen, another one with full health will spawn in its place. Either try to focus on one target at a time or bring a good crowd control weapon and try to circle the whole group. Location Map: http://deadfrontier.wikia.com/wiki/File:Big_Bang.jpg |
| Tracking |
|---|
|
Tracking Soldier! Ever seen one of those huge tentacle b*tches? Well, a few weeks ago our egg heads had some of my men put a tracking device on one. Some sh*t about learning the behavioural patterns of the infected in the advanced stages of mutation. Sounds like a load of horse sh*t to me.. Apparently the egg heads have lost their remote connection, and now the only way to collect the data is to physically retrieve the device. They seem to think this is data important enough risk my men's lives. Well I sure as hell don't agree! However, I haven't got a problem sending you in instead. I want you to go to the location marked on your map, find the she-beast, kill it, and get that damn tracking device back here on the double. Cash Reward:The value in brackets is the reward for Gold Members. $11000 ($22000) |
| Map [[File:{{{Map}}}|center|650px]] |
| Walkthrough Kill a Wraith in the area indicated on your map and retrieve the tracking device from the body. Be careful, as a Wraith is one of the most dangerous bosses and she will have the help of max aggro in the area. Location Map: http://deadfrontier.wikia.com/wiki/File:Tracking.jpg |
| Chopper Down |
|---|
|
Chopper Down Soldier! We just received a distress signal from one of our helicopters. I lost the transmission, but some of my men saw it coming down not too far from here. The transmission was fuzzy, but they mentioned some sort of large creature. I have no damn clue how one of those mush brain zombies could have taken down an armored chopper, but I sure as sh*t intend to find out. All our aerial units are equipped with a black box flight recorder. This should give us a good idea of what exactly happened if the pilots didn’t survive the crash. I marked the crash site on your map, get over there and get that black box. If the enemy has mutated again I want to know about it! Cash Reward:The value in brackets is the reward for Gold Members. $11500 ($23000) |
| Map [[File:{{{Map}}}|center|650px]] |
| Walkthrough Go to the highlighted area to loot a Flight recorder off the crashed chopper. Expect high aggro during the search. Hint: Hold E while walking beside the chopper Location Map: http://deadfrontier.wikia.com/wiki/File:Chopper_Down.jpg |
| Save The Data |
|---|
|
Save The Data Soldier! Remember that chopper that came down? The geeks back at the lab played back the flight recorder and it seems that the helicopter was carrying some kind of important cargo. Apparently some scientific data of vital importance, possibly saved on a hard disk of some sort. Well, those egg heads have come up with some good sh*t in terms of weapons in the past, so I told them I’d help them if I can. We need to recover that hard disk and bring it back to the fort. I’ve marked on the map the location of the crash. Get out there double-fast and bring back that data. Cash Reward:The value in brackets is the reward for Gold Members. $10000 ($20000) |
| Map [[File:{{{Map}}}|center|650px]] |
| Walkthrough Go to the highlighted area to loot a Hard disk off the crashed chopper. Titans, at least three, will spawn once the player attempts to loot the helicopter. Best way to avoid this is to play single mode to prevent more than 3 Titans spawning. The chopper is located in the same place as the mission "Chopper Down". Hint: Hold E while walking beside the chopper Location Map: http://deadfrontier.wikia.com/wiki/File:Save_The_Data.jpg |
| Chemistry Time |
|---|
|
Chemistry Time Soldier! It turns out that external hard disk we recovered has designs for some sort of new chemical weapon we can use to blast the sh*t out of those infected a**holes. The science nerds threw a bunch of technical words and chemistry at me... I don’t really know what they were jibber-jabbering about. What I did understand is that it will make their zombie flesh fall off the bone like a slow cooked pork shoulder. The lab wants to make this, but they need a bunch of chemicals. of course they started whining like little girls when I suggested they go get the sh*t themselves. I’m not sending my men out on a scavenging mission now, they are too exhausted from defending the Fort earlier this morning. I got no objection to sending your skinny ass however. I marked the location of some abandoned chemical transport vehicles on your map. Grab whats on this list and bring it back here ASAP. Cash Reward:The value in brackets is the reward for Gold Members. $9500 ($19000) |
| Map [[File:{{{Map}}}|center|650px]] |
| Walkthrough Collect 5 Chemicals from the trucks in the designated areas. Once you entered the areas, aggro will increase to the max. Location Map: http://deadfrontier.wikia.com/wiki/File:Chemistry_Time.jpg |
| Stomach Cramps |
|---|
|
Stomach Cramps Soldier! It seems that those science boys have really screwed up this time. That chemical weapon that was supposed to be so amazing... well, it didn’t work worth a sh*t. In fact, the damn thing backfired on us. Made the infected mutate into a horde of bloated fat-ass monstrosities. Ugly bastards, and damn dangerous too! These bloated fatsos have got to be put down before they figure some damn way to multiply. That's a scene I sure as hell don't want to imagine! I need you to travel to the location on your map and kill those fat bastards before they can do any more damage. Then bring your ass back here on the double. Cash Reward:The value in brackets is the reward for Gold Members. $11000 ($22000) |
| Map [[File:{{{Map}}}|center|650px]] |
| Walkthrough Go to the area marked on your map, then kill 150 bloats. Aggro will increase when you enter the area. Make sure to bring a crowd control weapon with a lot of ammo or get help from friends. Location Map: http://deadfrontier.wikia.com/wiki/File:Stomach_Cramps.jpg |
| Secronom Unlocked |
|---|
|
Secronom Unlocked Soldier! We found a video that was recorded by a geneticist at Secronom Labs. It turns out that before the outbreak they were developing a vaccine for the N4 virus, but the infected took over the lab and killed or infected the scientists. I’d bet they still have the data from that research. I sure as hell want to roll in with the science boys and get at that research. A couple of my scouts said that there are some infected scientists wandering around the facility. They still have their key cards to get past the automated security in the building. If we can acquire a few of these keycards, it will make it much easier to get into the facility without attracting a horde of infected. I want you to go kill the infected scientists and bring back their keycards. I’ve marked the location on your map. Cash Reward:The value in brackets is the reward for Gold Members. $11200 ($22400) |
| Map [[File:{{{Map}}}|center|650px]] |
| Walkthrough Go to the highlighted area, kill 5 zombie scientists and loot their keycards off their lootable corpses to complete the mission. Recommended to bring a automatic gun and a pistol/rifle for this mission, because aggro will be at max level. Location Map: http://deadfrontier.wikia.com/wiki/File:Secronom_Unlocked.jpg |
| Bloody Massacre |
|---|
|
Bloody Massacre Soldier! You see those keycards on the counter over there? Yeah, well, it turns out that’s all that’s left of the science team that we tried sending into Secronom Labs earlier today. Only one of my soldiers made it back, and he had been bitten. He was able to relay the event before I put a .45 round in his head. Didn't have much choice... damn shame. So evidently the convoy escorting the scientists was ambushed by a huge group of infected. As a result I have lost some of my best men along with some of the greatest scientific minds in the country. The best we can do at this point is to recover their laptops, and try to piece together whatever we can of their research. Get to the ambush site and recover the scientists’ laptops. I have marked the location on your map. Cash Reward:The value in brackets is the reward for Gold Members. $12000 ($24000) |
| Map [[File:{{{Map}}}|center|650px]] |
| Walkthrough Loot 3 laptops off the dead corpses in the highlighted area. Aggro will be at max level so bring a crowd control weapon and a pistol/rifle for this mission. The laptops are easily found in the area. Location Map: http://deadfrontier.wikia.com/wiki/File:Bloddy_Massacre.jpg |
| Mow Down |
|---|
|
Mow Down Soldier! Have you been out making friends with the locals or something? For some reason the number of infected around the fort has been growing incredibly fast. This is not ok with me. How the hell am I supposed to enjoy a cold beer in the evening when I know a mob of those drooling bastards is milling around 50 yards from my bunk? I feel like a magic brownie at a music festival right now. Maybe you’re ok with being munched on by those crazies... but I sure as sh*t ain't. They seem to be assembling around some of the weaker parts of our fortification. I hope it’s just a coincidence, but I don’t believe it is. I need you to move out with a group of my men and cull the population to a less threatening level. I’ve marked the most active infected areas on your map. Cash Reward:The value in brackets is the reward for Gold Members. $10500 ($21000) |
| Map [[File:{{{Map}}}|center|650px]] |
| Walkthrough Kill 2000 infected in the marked area(Very long and time consuming). Make sure to bring a crowd control weapon with a lot of ammo, maybe even help from friends. The commander also sent 4 soldiers equipped with Assault Rifles for this mission. They can be located anywhere in the mission area, so finding them and using them to your best advantage is a viable strategy. Location Map: http://deadfrontier.wikia.com/wiki/File:Mow_Down.jpg |
| Mother Lovin' |
|---|
|
Mother Lovin' Soldier! Somehow the mess hall “acquired” meat that was infected with the N4 virus. Luckily most of our men were out scouting at the time, but at least 5 females have shown symptoms of being infected. The scientists have done tests, and it seems to be the same strain as the mutation that creates the “Mothers.” Yup that's right, I'm talking about those ungodly, hairy as an ape, 15ft pregos from hell! I need you to collect blood samples from two of these existing beasts as quickly as possible, maybe our nerds can figure out a way to stop this before this sh*t gets ugly. I have marked a hot spot for these b*tches on your map. Get to it! Cash Reward:The value in brackets is the reward for Gold Members. $13000 ($26000) |
| Map [[File:{{{Map}}}|center|650px]] |
| Walkthrough All you have to do is collect 2 blood samples from the 2 mothers. Be prepared to kill more than 2 as some may not be lootable. There will be some sudden aggro spikes, so bring with you a good crowd control weapon and some ammo. Location Map: http://deadfrontier.wikia.com/wiki/File:Mother_Lovi%27n.jpg |
| Hunger Strikes |
|---|
|
Hunger Strikes Soldier! I’m not sure if you’ve noticed, but we are running out of food rapidly. We only have a couple days left before we are reduced to a 25% ration of plain rice and water for everyone. That doesn’t sound very appealing to me. I can’t have my men running around fighting these creatures with an empty stomach. They will fatigue in no time and end up as inverted sushi rolls for the infected. I spotted some old food supply trucks not too far from here. I want you to travel to the locations I have marked on your map and loot enough food to restock the fort’s supply. See if you can knock off a couple of those infected bastards on the way.. just for good measure. Cash Reward:The value in brackets is the reward for Gold Members. $10100 ($20200) |
| Map [[File:{{{Map}}}|center|650px]] |
| Walkthrough Collect 10 food supplies from pickup trucks. Be careful as aggro will be high. Once you enter the mission area, zombies will start spawning. This mission is somewhat related to Nastya's Holdout "The Hunger" mission. Location Map: http://deadfrontier.wikia.com/wiki/File:Hunger_Strike.jpg |
| Sixteen Legs |
|---|
|
Sixteen Legs Soldier! There's no time to chit-chat. Those damn spiders are back. Two extra huge, flaming freaks, fresh outta hell to be exact! And they're heading directly for us! We're gonna need every last ounce of firepower in the Fort to drive these bastards back where they came from. Get your sh*t together and meet us at the location I've marked just outside the Fort. Let's light these monstrosities up! Cash Reward:The value in brackets is the reward for Gold Members. $15000 ($30000) |
| Map [[File:{{{Map}}}|center|650px]] |
| Walkthrough Kill 2 Flaming Giant Spiders in the highlighted area not far from Fort Pastor. Make sure to bring medical kits and lots of ammo for this mission. It's best to play single mode to prevent more FGS to come out. The Commander will help you with his minigun and will bring 3 of his men with Assault Rifles. Location Map: http://deadfrontier.wikia.com/wiki/File:Sixteen_Legs.jpg |
| Trade Off |
|---|
|
Trade Off Soldier! I’ve got some good news. Just spoke with the boys from over at Precinct 13 and they have a sh*tload of high powered explosives ranging from grenades and mines all the way up to packages of C4. They evidently found an abandoned military transport vehicle. They figured we would make better use of these explosives since they aren’t trained in the deployment of these devices. I need you to meet up with them half way to pick up the explosives, and then bring them back to the Fort. I marked the meet-up coordinates on your map. Cash Reward:The value in brackets is the reward for Gold Members. $11000 ($22000) |
| Map [[File:{{{Map}}}|center|650px]] |
| Walkthrough Go to the highlighted area to loot the 2 supply boxes off the cop cars. Location Map: http://deadfrontier.wikia.com/wiki/File:Trade_Off.jpg |
| Big, Red And Spiky |
|---|
|
Big, Red And Spiky Soldier! Where have you been? So you must not have noticed how everyone is running around in a panic, packing up ammunition? Of course not. One of my scouting units reported a group of giant red, spiky freaks surrounding the Fort. I sent out a group of soldiers to eliminate the threat, and those bony giants ripped my men apart like they were opening a Christmas present! Do I have your attention now? Those giant bastards are going to tear our walls down if we don’t eliminate them immediately. I don’t have extensive experience engaging them, but you’re pretty smart for a grunt, so I’m going let you figure it out. Take your ass out there and kill those 5 to the north! I’ve marked their current location on your map. Cash Reward:The value in brackets is the reward for Gold Members. $12750 ($25500) |
| Map [[File:{{{Map}}}|center|650px]] |
| Walkthrough Kill five titans in the marked area. All five will spawn at one time. It is recommended to bring an automatic weapon or a weapon that does a high amount of damage. There is also a football field with nets around it some where in the area. Use them as your best advantage to block the Titans outside the nets. Location Map: http://deadfrontier.wikia.com/wiki/File:Big,_Red_and_Spiky.jpg |
| Time's Up |
|---|
|
Time's Up Soldier! Do you see this? This wrist watch was passed down from my great grandfather. Look at it now. One of those goddamn Leapers shot his tongue at me and hit my watch instead of my arm. This damn watch saved my life, but now it’s basically destroyed. I’m going to try and have this watch repaired, but until then I need to have a decent, working replacement. I can’t conduct a military maneuver with a goddamn sundial! You seem like the kind of sissy that would have an eye for fashion, am I right? I need you to go loot, er... I mean find me a replacement watch. Chances are some dead guy will have one. I’ve marked a likely location on your map. Cash Reward:The value in brackets is the reward for Gold Members. $13500 ($27000) |
| Map [[File:{{{Map}}}|center|650px]] |
| Walkthrough Loot a watch off a dead corpse in the highlighted area. High aggro will be common in the area while looting. Location Map: http://deadfrontier.wikia.com/wiki/File:Times_Up.jpg |
| Big Tongues |
|---|
|
Big Tongues Soldier! Have you had any encounters with the Leapers? These things have super long, poison tongues. One touch of that sh*t and you're dead and buried in a matter of seconds. Anyway our egg heads want to study that poison, and see if we can somehow turn it against them. I sent out one of our jeeps earlier with a spotter to try and locate some of the leapers. Turns out there are a few of them just up the road. I marked the location on your map. Get over there and grab us some blood samples! Cash Reward:The value in brackets is the reward for Gold Members. $17000 ($34000) |
| Map [[File:{{{Map}}}|center|650px]] |
| Walkthrough Kill 8 leapers and loot them for blood samples. Be extremely cautious as leapers can deliver a one hit kill. Multiple leapers, up to and more than, twenty will spawn at once, even on single player mode. Location Map: http://deadfrontier.wikia.com/wiki/File:Big_Tounges.jpg |
| Intercept The Unknown |
|---|
|
Intercept The Unknown Soldier! Looks like we've got a situation on our hands. Our scouts just spotted a horde of infected creatures heading straight for the Fort. These things look very different to anything we've encountered so far, elongated arms and large heads. We have no idea how dangerous they are, so I'm not risking them getting close. I want you to intercept and eliminate this horde before it can get within striking distance of our stronghold. I've marked their current location on your map. Get to it! Cash Reward:The value in brackets is the reward for Gold Members. $15000 ($30000) |
| Map [[File:{{{Map}}}|center|650px]] |
| Walkthrough Kill 350 Longarms in the designated area. Expect high aggro. Bring a good crowd control weapon(Machine guns,auto shotguns),lots of ammo and friends to defeat the horde of Longarms and other infected. Location Map: http://deadfrontier.wikia.com/wiki/File:Intercept_The_Unknown.jpg |
| Stack Em and Burn Em |
|---|
|
Stack Em and Burn Em Soldier! After dealing with that horde of long arms we've got a ton of decaying corpses littering the streets around the Fort. It's beginning to smell like the inside of a hog's ass 'round here! Our science boys are starting to worry about infection and all the other shit that comes with too many bodies laying around. I'm organizing a group of men to collect and burn the corpses. Unfortunately, we're running low on gasoline and experience tells me that igniting bodies without it ain't gonna be easy. You know the drill by now. I want you to head to the location I've marked on the map and syphon as much fuel out of the vehicles as you can. Then get your scrawny ass back here on the double. Cash Reward:The value in brackets is the reward for Gold Members. $12500 ($25000) |
| Map [[File:{{{Map}}}|center|650px]] |
| Walkthrough Siphon 10 cans of gasoline from abandoned vehicles found in the designated area. Note that only several vehicles can be looted. This mission is somewhat related to "Tanks get thirsty too" mission. Location Map: http://deadfrontier.wikia.com/wiki/File:Stack_Em_And_Burn_Em.jpg |
| Some New Talent |
|---|
|
Some New Talent Soldier! We've been getting some calls for help over the radio. Details are sketchy, but it sounds like a lone female survivor trapped in the far eastern part of the city. I don't know about you, but I sure as hell ain't happy with the lack of women folk around here. Time for some fresh talent don't ya think? Haha! I want you to get yourself up to her location and bring her back to the Fort ASAP. I've marked her position on your map. Cash Reward:The value in brackets is the reward for Gold Members. $14000 ($28000) |
| Map [[File:{{{Map}}}|center|650px]] |
| Walkthrough Find Tanya in the marked area. She can be found alive anywhere in the area holding a rifle. Location Map: http://deadfrontier.wikia.com/wiki/File:Some_New_Talent.jpg |
| Bleed Em Dry |
|---|
|
Bleed Em Dry Soldier! As you may recall, we had to deal with a horde of long armed, mutated freaks not too long ago. As usual when we encounter some new beasties, our science boys have started their high pitched whining, asking for samples. Yep that's right, these are the same geniuses who asked us to burn the bodies just a couple of days ago! Anyhow, since I'm as desperate for a cure as the next guy I'm going to do as they ask. Or to be exact, you're going to do as they asked. Get over to the location I've marked on your map and bring me back some blood samples from those long arms. And please hurry, these nerds are giving me a headache. Cash Reward:The value in brackets is the reward for Gold Members. $13500 ($27000) |
| Map [[File:{{{Map}}}|center|650px]] |
| Walkthrough Collect 10 blood samples from the Long Arms. High aggro will be filled in the highlighted area. Location Map: http://deadfrontier.wikia.com/wiki/File:Bleed_Em_Dry.jpg |
| Think Of The Children |
|---|
|
Think Of The Children Soldier! During the outbreak not too many children survived. To be honest, I'm glad that they didn't. Poor little tikes don't deserve the agony of living in this sh*t hole of a world. However, we do have the odd few living at the Fort. Most of them don't have any family left. They just sit indoors, day after day, bored out of their little skulls, thinking negative thoughts. We need to keep them distracted, keep them entertained. Unfortunately a military outpost isn't really equipped for that kind of thing. So I'd like to get some toys brought in. I've marked the location of an old toy store on your map. Perhaps you'll be able to find something for them in the area around it. Cash Reward:The value in brackets is the reward for Gold Members. $10000 ($20000) |
| Map [[File:{{{Map}}}|center|650px]] |
| Walkthrough Collect 10 toys in the highlighted area. High aggro will fill the area once you entered it. Make sure to bring a crowd control weapon or a descent pistol/rifle.The loots will respawn and the aggro will decrease for a while if one often re-enter the area,making the looting part easier. Location Map: http://deadfrontier.wikia.com/wiki/File:Think_Of_The_Children.jpg |
| Rumbler Samples |
|---|
|
Rumbler Samples Soldier! It seems we've discovered yet another new variety of infected. These things seem to be the polar opposites of the long arm mutation. Short stumpy arms, small heads, huge torsos, and they make a real low pitched growling sound. Some of the boys have started referring to them as rumblers. The science nerds are of course whinging about samples and research again. As much as I hate their guts, my instincts are telling me to grant their request. Make your way over to the location I've marked on your map, and collect blood samples from these rumblers. Cash Reward:The value in brackets is the reward for Gold Members. $15000 ($30000) |
| Map [[File:{{{Map}}}|center|650px]] |
| Walkthrough Go to the highlighted area (Warning!The mission area is located in the End Zone!) collect 10 blood samples from the rumblers. Expect very high aggro. Bring good crowd clearing weapon and expect to kill more then 10 to get your samples as they all might not be lootable. There is a small sports field with nets around it at the bottom left corner area with only one entry, use that as your best advantage to clear out the horde and loot the lootable bodies for the samples. Location Map: http://deadfrontier.wikia.com/wiki/File:Rumbler_Samples.jpg |
| Put Them Down |
|---|
|
Put Them Down Soldier! During the attack last night, several of our civilians got bitten. In the panic that followed, some of them went crazy and ran off into the city before we could stop them. I knew some of these people quite well. Obviously they're going to turn sometime very soon, and that's one sh*tty fate I wouldn't wish on my worst enemy. I'd like you to go out into the city and put them out of their misery. Be sure to bring back some kind of ID as proof of who they were. I've marked some possible locations on your map. Cash Reward:The value in brackets is the reward for Gold Members. $12500 ($25000) |
| Map [[File:{{{Map}}}|center|650px]] |
| Walkthrough Go to the highlighted area and kill five infected friends. Once you kill them you'll find few bodies that can be looted with an ID profile card or wallet. Expect high aggro. The only zombies that will drop ID cards or wallets are irradiated zombies. Location Map: http://deadfrontier.wikia.com/wiki/File:Put_Them_Down.jpg |
| My Boys Need Beer |
|---|
|
My Boys Need Beer Soldier! After the recent attack everyone's getting pretty down around here. Morale is totally in the sh*tter. I'm thinking it's about time we all kicked back and enjoyed ourselves for a bit. Some kind of a celebration is in order. The biggest obstacle to this plan is the severe lack of alcohol around this place. My boys need some beer goddamnit! I've marked the location of an old brewery on your map. Get your ass over there and loot as much beer as you can carry. That's an order! Cash Reward:The value in brackets is the reward for Gold Members. $11000 ($22000) |
| Map [[File:{{{Map}}}|center|650px]] |
| Walkthrough Go to the highlighted area and loot 10 bottles of beer from bodies, cars, and other things. Looting may prove to be difficult with high aggro in the area. Location Map: http://deadfrontier.wikia.com/wiki/File:My_boys_needs_beer.jpg |
| Bring Your Big Guns |
|---|
|
Bring Your Big Guns Soldier! Our scouts are reporting rapid increases in the number of rumblers in the far eastern part of the city. I'm worried they may end up swarming towards the Fort at some point. And that sure as sh*t ain't a risk I'm willing to take. I've marked their location on your map. Get over there and blow those bastards away ASAP. Be warned tough, they are tough as hell, so be sure to bring your big guns. Cash Reward:The value in brackets is the reward for Gold Members. $17000 ($34000) |
| Map [[File:{{{Map}}}|center|650px]] |
| Walkthrough Go to the highlighted area and kill 300 rumblers. Be sure to bring some ammo. Auto shotguns and Heavy Machine Guns recommended. Be warned of longarms and the frequency of Tendrils as the designated area is located in the End Zone. Location Map: http://deadfrontier.wikia.com/wiki/File:Bring_your_big_guns.jpg |
| Man Flu |
|---|
|
Man Flu Soldier... Yeah that's right, laugh it up fuzzball. Your commander is as sick as a damn parrot. It's not just me either. Half of my men are puking their guts out right now. I can tell you, it ain't pretty. Unfortunately our docs have run out of basic medical supplies, and aren't able to treat whatever infection is sweeping through the camp. If we don't get a hold of that stuff soon we won't have enough well men to keep the Fort protected. I need you to go to the location I've marked on your map, and loot some medical supply trucks there. Be sure to get me some aspirin while you're there too, my damn head is killing me. Cash Reward:The value in brackets is the reward for Gold Members. $11500 ($23000) |
| Map [[File:{{{Map}}}|center|650px]] |
| Walkthrough Go to the highlighted area and loot 5 crates of medical supplies from pick up van. Looting may be difficult due to high aggro in the area. Location Map: http://deadfrontier.wikia.com/wiki/File:Man_flu.jpg |
| Fighting Retreat |
|---|
|
Fighting Retreat Soldier! Recently we've been sending our scouting patrols further east as that is where the biggest threats seem to be coming from. Unfortunately the sheer power and volume of infected in that area is proving an incredibly tough challenge for my men. I just received a radio communication from one of those teams. They're pinned down by a massive swarm, and are running low on ammunition. If we don't help, those boys will be decorating the pavement by tea time. I need you to get over there ASAP and cover their retreat. I've marked their location on your map. Cash Reward:The value in brackets is the reward for Gold Members. $11500 ($23000) |
| Map [[File:{{{Map}}}|center|650px]] |
| Walkthrough Go to the designated area, talk to 5 soldiers and kill 500 infected. Heavy aggro surrounds the area so be prepared, and the soldiers will leave as soon as they talk.This mission is related to the mission "Pinned Down" Location Map: http://deadfrontier.wikia.com/wiki/File:Fighting_retreat.jpg |
| War On Tentacles |
|---|
|
War On Tentacles Soldier! I assume you're familiar with tendrils? Over in the eastern part of the city the numbers of those tentacle b*tch mutations appear to be growing at a staggering rate. If you've ever encountered one you know those things are as deadly as sin. Ultra fast, ultra long reach, and ultra deadly. I can't risk those things getting anywhere near our civilians. I'm sending a team of my best men out to exterminate those b*tches ASAP. I'd like you to join them. Rendezvous with the men at the location I've marked on your map and wipe those monstrosities out! Cash Reward:The value in brackets is the reward for Gold Members. $13500 ($27000) |
| Map [[File:{{{Map}}}|center|650px]] |
| Walkthrough Go to the designated area , Meet up with 4 soldiers and kill 250 tendrils. Be careful; Tendrils are very fast and deal severe amounts of damage in one hit. Bring lots of ammo, and consider using auto shotguns for knock-back and heavy machine guns for crowd control. High Aggro is to be expected. Location Map: http://deadfrontier.wikia.com/wiki/File:War_on_tentacles.jpg |
| Alarm System |
|---|
|
Alarm System Soldier! My men are in the process of setting up an early warning system around the Fort. It's essentially a series of trip wires, that when activated will automatically sound our alarm siren. It's a great system that will surely save countless lives. However it's going to require a lot of battery power to make it work effectively. As you might of guessed, that's something we're running low on. Car batteries will work nicely. I need you to go to the location I've marked on your map and rip as many working batteries as you can find out out of the cars there. Then bring them back to me ASAP. Cash Reward:The value in brackets is the reward for Gold Members. $12750 ($25500) |
| Map [[File:{{{Map}}}|center|650px]] |
| Walkthrough Go to the highlighted area and loot 8 Car Batteries. Looting may be difficult due to high aggro in the area. Location Map: http://deadfrontier.wikia.com/wiki/File:Alarm_system.jpg |
| Gold Star |
|---|
|
Gold Star Soldier! We got a radio message from a group of survivors this morning. Turns out they were trying to reach the Fort on a school bus. Unfortunately the damn thing broke down, and now they're stranded in a shitstorm of infected. Me being the kind old gentlemen that I am offered to send our finest soldiers to their aid. Yep, I lied. I'm sending you instead! Haha! Get your scrawny behind down to the location I've marked on your map and get those civilians out of danger. Their lives are in your hands kiddo. Cash Reward:The value in brackets is the reward for Gold Members. $12400 ($24800) |
| Map [[File:{{{Map}}}|center|650px]] |
| Walkthrough Locate and rescue 5 civilians in the marked area. High aggro should be expected.Some of the civilians will be using weak melee weapons such as baseball bats while others will be in tight spots. Location Map: http://deadfrontier.wikia.com/wiki/File:Gold_Star.jpg |
| Betsy Is Broken |
|---|
|
Betsy Is Broken Soldier! As you may well know we got Betsy, our resident war machine going again recently. That thing carved a sweet ass hole in the infected population for a while. Unfortunately she's thrown a track, and we don't have the spare parts to fix it. Some of our scouts mentioned seeing several military supply trucks nearby. I'm betting those will have serviceable parts we can use. I need you to locate these trucks and grab all spare parts my engineers are after. I've marked some possible locations on your map. Get to it soldier! Cash Reward:The value in brackets is the reward for Gold Members. $12500 ($25000) |
| Map [[File:{{{Map}}}|center|650px]] |
| Walkthrough Go to the highlighted area and loot 8 Machine Parts from Military Trucks. Location Map: http://deadfrontier.wikia.com/wiki/File:Betsy_is_broken.jpg |
| Missing Boy |
|---|
|
Missing Boy Soldier! Little Peter, one of the few kids we have living at the base went missing last night. Apparently he got scared during the attack and ran off into the city streets. One of my men thought he saw him heading north. He tried to follow, but lost his trail in all the confusion. I promised his mother that we'd send someone to look for him at first light. I've marked some possible locations on your map. Find that boy and bring him back here in one piece. Cash Reward:The value in brackets is the reward for Gold Members. $12500 ($25000) |
| Map [[File:{{{Map}}}|center|650px]] |
| Walkthrough In order to finish this mission, you'll have to find Peter by killing a Mother. Aggro can be high once you've entered the highlighted area North of Fort Pastor. Once you have killed the Mother, loot the dead body for the Child's body. Bring some ammo and friends if needed. Location Map: http://deadfrontier.wikia.com/wiki/File:Missing_boy.jpg |
| Radio Waves |
|---|
|
Radio Waves Soldier! Radios are an incredibly useful tool in the fight against the infected. It's absolutely essential that we can keep in contact with our men in the field. Unfortunately many of our units have been malfunctioning lately. As luck would have it, there are several abandoned army trucks equipped with radio devices that we can salvage. I've marked the location of some of these trucks on your map. Find those trucks and bring me back as many radio units as you can find. Cash Reward:The value in brackets is the reward for Gold Members. $15000 ($30000) |
| Map [[File:{{{Map}}}|center|650px]] |
| Walkthrough Go to the highlighted area and loot 10 radio devices from abandoned Trucks. Location Map: http://deadfrontier.wikia.com/wiki/File:Radio_waves.jpg |
| Crush The Opposition |
|---|
|
Crush The Opposition Soldier! The numbers of infected in the eastern part of the city continue to grow exponentially despite our best efforts. What's more, they are slowly migrating west towards the Fort. I can't stand this sh*t any longer. My best men and I are just about to head over there and mow these f**kers down. We're going to obliterate every last thing in the area. I'm even taking Betsy, my prized tank along with us. Since I'm aiming for maximal firepower, I think it would be damn shame if I didn't include you in this act of zombie genocide. Rendezvous with us at the location I've marked on your map. Then let's blow every last one of these infected sons of b*tches into the sky! Cash Reward:The value in brackets is the reward for Gold Members. $16000 ($32000) |
| Map [[File:{{{Map}}}|center|650px]] |
| Walkthrough Go to the highlighted area ,meet up with the commander and kill 750 infected so bring tons of ammo. Location Map: http://deadfrontier.wikia.com/wiki/File:Crush_the_opposition.jpg |
| Big Black Thing |
|---|
|
Big Black Thing Soldier! Holy mother of god, you aren't going to believe this sh*t! We've just spotted one huge titan rampaging across the city. This ain't no normal titan, it f**king huge! As I've sure you've guessed, this monstrosity is heading right for the Fort. That damn thing is running so fast I'm barely going to have time to mobilize my men. I need you to intercept this beast and at the very least buy us some time. Brownie points if you can kill it yourself. I've marked it's position on the map. Get over there ASAP! Cash Reward:The value in brackets is the reward for Gold Members. $14750 ($29500) |
| Map [[File:{{{Map}}}|center|650px]] |
| Walkthrough Kill a Black Titan in the designated area. Be warned that the Black Titan is one of the strongest bosses in the game, with a godly amount of health. It is capable of dealing enough damage to bring a full-health individual to Critical with a single blow. So bring lots of friends and ammo. Anyone who doesn't have high Agility/Endurance and/or decent weapons are strongly recommended not to do this mission, at least not on their own. It is recommended to have at least 100+ Agility. HINT: There is a small fence area at center-right. Use that as your best advantage to kill the Black Titan. Have 100 endurance, an Exterminator Reactive XT and a speed boost if you want to find it face-to-face. Location Map: http://deadfrontier.wikia.com/wiki/File:Big_black_thing.jpg |
Secronom Bunker Missions
Missions for Secronom Bunker were added on 16 December 2014, alongside the "Mystery Box" update.
Note: At the moment, the background images do not represent those of the Bunker's. This would require digging through the game's files to find the image, which is not an easy task. Please wait...
| Firearm Shortage |
|---|
|
Firearm Shortage It's true. We are well protected this far underground. However, we only have the resources to arm a handful of guards guards at any given moment. To my mind, this simply isn't good enough. It is my ambition that every adult living in this facility should have access to a firearm in the event of an emergency. There are several overrun military camps not far from here, the locations of which I marked on your map. I would ask you venture out and retrieve as many working semi-automatic rifles from the camps as you can. I'm sure we can find some way to compensate you. Cash Reward:The value in brackets is the reward for Gold Members. $30000 ($60000) |
| Map [[File:{{{Map}}}|center|650px]] |
| Walkthrough Loot 10 M16 assault rifles in the two designated locations. This mission is unique as the mission areas are far apart from each other rather than one cluster of blocks. As of now, there is little to no aggro in the mission areas, although caution should be taken as the rifles can only be looted outside, in the vicinity of powerful enemies. Desperation tip: enter from the bottom right corner of the area. Go into the nearest building. Enter and leave the building while looting the closest truck, to recycle loot spots. |
| Security Leak |
|---|
|
Security Leak Secronom was once a major employer in Fairview, with several research facilities located in the area. When the outbreak started, many personnel fled into the streets and no doubt most of them did not survive the ordeal. This leaves us with a potential security weakness, as their Secronom Keycards could fall into the hands of mercenaries. This may give them access to sensitive data and illegal accesss(sic) to this very installation. I simply could not allow such a thing. I've marked the locations of three other fallen Secronom Bunkers on your map. I would ask that you venture out and retrieve as many of these keycards from the surrounding areas as possible. Once collected, please return the keycards here for destruction. Cash Reward:The value in brackets is the reward for Gold Members. $31000 (62000) |
| Map [[File:{{{Map}}}|center|650px]] |
| Walkthrough Loot the designated amount of keycards in the mission areas. Desperation tip: go to the bunker, enter and leave it. Loot the closest loot spot outside the bunker. Re-enter the bunker and leave it to recycle those loot spots. Repeat. |
| New Life |
|---|
|
New Life I have some fortunate news. Miranda, one of our researchers became pregnant earlier in the year, and she has just given birth to a healthy baby boy. We now also have two other women in the early stages of pregnancy. I am keen to do everything possible to nurture the next generation in the interests of prolonging the survival of the human race. However, I am the first to admit this facility is severely lacking in items necessary to raise children. I've marked the locations of several well known stores and warehouses where these items might be found. Search the surrounding area carefully, I'm sure you'll turn up something. Please bring as much as you can back here. Cash Reward:The value in brackets is the reward for Gold Members. $25000 (50000) |
| Map [[File:{{{Map}}}|center|650px]] |
| Walkthrough Loot 10 toys in the mission areas. Desperation tip: carefully search for a building in the area you have chosen that has a loot spot near it. Recycle that loot spot by entering the building and leaving it to obtain 10 toys. Aggro doesn't appear immediately after you leave the building. |
| Extraction |
|---|
|
Extraction I have just received some distressing news. Our sister facility to the south has just been overrun with infected. I am praying that at least some of our colleagues made it out alive. However, even if they escaped they will not survive in the streets for long. We must mount a rescue mission immediately. I have marked the location of the facility on your map. Please get there as soon as possible and extract any survivors. You will be rewarded for your efforts. Cash Reward:The value in brackets is the reward for Gold Members. $28000 (56000) |
| Map [[File:{{{Map}}}|center|650px]] |
| Walkthrough This mission tells you to rescue 4 scientist's, high aggro is common so bring lots of ammo and friends if you need company. |
| Valuable Data |
|---|
|
Valuable Data We recently rescued several of my colleagues, including Dr Radcliffe from our overrun sister facility. Just before he escaped Dr Radcliffe managed to extract all of their research data to a portable disk drive. He entrusted the disk to Adam, a younger and fitter member of the team who he thought would be more likely to survive. Unfortunately we haven't managed to locate Adam yet. I've marked the location of the sister facility on your map. Please search the surrounding areas for Adam and either rescue him, or retrieve the missing disk drive from his body. Cash Reward:The value in brackets is the reward for Gold Members. $24000 ($48000) |
| Map [[File:{{{Map}}}|center|650px]] |
| Walkthrough This mission tells you to loot a hard disk in the area, aggro is mostly moderate, bring some ammo if you need it. |
| A Merciful End |
|---|
|
A Merciful End I've now instructed my men to stay away from our overrun sister facility due to the extreme risk levels there. However I do have one final task for you. When I think about the pour souls, the good men and women who worked there my heart feels heavy. Most of them are probably infected, walking the streets as mutant abominations with no control over their actions. I cannot allow this, we must show them mercy. I've marked the location of the fallen Secronom installation on your map. Please travel there and give my infected colleagues the end they deserve. Cash Reward:The value in brackets is the reward for Gold Members. $24000 ($48000) |
| Map [[File:{{{Map}}}|center|650px]] |
| Walkthrough The mission tells you to kill 100 Secronom lab workers, bring tons of ammo and friends because very high aggro is in the area. |
| Generator Trouble |
|---|
|
Generator Trouble You may have noticed that the power has been on and off these past couple of weeks. Unfortunately our generators are beginning to show their age and will need several replacement parts soon. My team simply cannot continue their research in these conditions much longer, so location these parts is of prime importance. I've marked some locations on your map where I think you may be able to find trucks containing these parts. Please search these locations and bring the generator parts to us as soon as possible. Cash Reward:The value in brackets is the reward for Gold Members. $21000 ($42000) |
| Map [[File:{{{Map}}}|center|650px]] |
| Walkthrough This mission tells you to find 5 machine parts from trucks in the areas, aggro is moderate |
| Power Trip |
|---|
|
Power Trip When Secronom built this facility in the late 1990s they ensured it was stocked with a large tank of fuel for running the generators. Unfortunately this supply is beinning to run dry and we're having to look for additional fuel sources. My men have already syphoned as much as they can from vehicles surrounding the bunker, so we'll have to look further afield. However travelling this far out is too dangerous for them, which is why I'm speaking to you. I've marked some locations on your map, where we have yet to take fuel from vehicles. Please go there and syphon as much of this as you can. Cash Reward:The value in brackets is the reward for Gold Members. $27500 ($55000) |
| Map [[File:{{{Map}}}|center|650px]] |
| Walkthrough The mission asks you to siphon fuel from 10 cars, aggro is quite high so have ammo and good guns ready This mission is kind of similar to the "Suck On This" mission in Doggs Stockade |
| Find Evan |
|---|
|
Find Evan I'm afraid I have some distressing news. Evan, a young boy we rescued some days ago has gone missing. We've searched every inch of this facility and he is certainly not here. I can only assume he managed to sneek outside without anyone noticing. If that's the case then I fear his chances are slim. Even so, we must make every effort to find him. I've marked the locations surrounding the bunker on your map. I do not believe he could have gotten much farther than this. Search for the boy, and bring him back to us. Cash Reward:The value in brackets is the reward for Gold Members. $29500 ($59000) |
| Map [[File:{{{Map}}}|center|650px]] |
| Walkthrough The mission tells you to find Evan, Evan is dead, you need to kill a bloat, not any bloat however, once you have killed the right bloat, loot it for a child's body. Aggro is high, so bring tons of ammo and friends if needed |
| Blood Hounds |
|---|
|
Blood Hounds We're making great progress in our fight against the N4 virus. However we are currently missing several pieces of the puzzle, in terms of how the virus might react to different sets of DNA. One particular strain we'd like to isolate is one that's been running through the canine population of Fairview. In particluar, we'd like to focus on the most advanced mutations seen only in the largest of infected animals. I've marked some locations on your map where you are likely to find a large number of these animals. Extract as many blood samples from their corpses as you can and return them to us as soon as possible. Cash Reward:The value in brackets is the reward for Gold Members. $24000 ($48000) |
| Map [[File:{{{Map}}}|center|650px]] |
| Walkthrough The mission tells you to kill 10 blood hounds and loot them for blood samples, be mindful that not all dogs can be looted so you will need to kill multiple. Aggro is very high, so bring tons of friends and ammo |
| Extract My Men |
|---|
|
Extract My Men Our scouts noticed an incredibly large, heavily mutated beast lurking just a few blocks away from this facility. I immediately ordered my men to try and obtain a blood sample from this beast. Judging from the radio transcript that followed, they were completely and utterly outmatched. It appears that they were unable to stand their ground and have been seperated. We have since been unable to contact most of the team. I've marked the location where the beast was spotted on your map. I need you to get to that location ASAP and extract any survivors from the scene. Cash Reward:The value in brackets is the reward for Gold Members. $21000 ($48000) |
| Map [[File:{{{Map}}}|center|650px]] |
| Walkthrough Find 5 men in the area, they can be found anywhere, scattered around the area, aggro is very high so bring tons of ammo and friends. You will also need to talk to the men, so that means protecting them so they can talk, which takes time. |
| Need A Bigger Vial |
|---|
|
Need A Bigger Vial We had previously hoped to obtain a blood sample from a large, heavily mutated beast spotted to the south. However my men were unable to contain the beast, and we soon lost track of it. Luckily, my scouts have just spotted the beast again nearby. This time I think i'll leave this to the professionals. I've marked the location of the beast on your map. head there and obtain a blood sample from this monstrosity. Cash Reward:The value in brackets is the reward for Gold Members. $26750 ($53500) |
| Map [[File:{{{Map}}}|center|650px]] |
| Walkthrough This mission asks you to kill a flaming black titan. WARNING: THE FLAMING BLACK TITAN IS THE MOST POWERFUL BOSS IN THE GAME AND WILL POSSIBLY KILL YOU IN 1 HIT! It is recommended to have tons and tons of ammo and friends, a speed boost or damage boost if you can buy one, note that there is extremely high aggro in the area. |
| To The Slaughter |
|---|
|
To The Slaughter We've just received word of a truely massive horde of infected heading towards this facility. Whilst we can always initiate our lock-down procedure, this would be the absolute last resort. The last time we used that option, we ended up under siege for several weeks before the horde finally lost interest and moved on. We'd rather not find ourselves trapped like that again. I've marked the location of this horde on your map. Rendezvous with my men stationed there and exterminate the horde before they can reach the bunker. Cash Reward:The value in brackets is the reward for Gold Members. $30,500 ($61,000) |
| Map [[File:{{{Map}}}|center|650px]] |
| Walkthrough Working on Walk through now, please be patient. |
| Baby Blues |
|---|
|
Baby Blues A young researcher named Miranda gave birth to a baby boy recently. Unfortunately the inital excitement of being a new a mother quickly faded and she's since slipped into post-natal depression. We have been doing our best to help her cope, but it seems we have failed. I entered her dorm this morning to find the baby crying in his crib, with no sign of his mother. One of the guards on duty last night says she came outside and asked him for a cigarette, but by the time he had found one she had disappeared. I can only assume she ran off into the city. I've marked several locations where friends of Miranda think she may have gone. Please search these locations thoroughly for any sign of her. Cash Reward:The value in brackets is the reward for Gold Members. $26,750 ($53,500) |
| Map [[File:{{{Map}}}|center|650px]] |
| Walkthrough Head to the designated area and begin talking with Miranda. You'll need to fend of waves while she tells her story, bring loads of ammo and expect high aggro. Having friends help fend of the waves will only improve your chances! |
| Extinquish |
|---|
|
Extinquish Sorry there's not much time to chat. We've just spotted a group of infected canines that are currently alight. As you may already know the N4 virus has a very strange reaction when heated to these levels, causing the subject to mutate rapidly. This is a rare oppurtunity to study these extreme mutations in canines. I've marked the last known location of these animals on you map. Please go there and collect as many blood samples from the burning creatures as you can. Cash Reward:The value in brackets is the reward for Gold Members. $22,000 ($44,000) |
| Map [[File:{{{Map}}}|center|650px]] |
| Walkthrough N/A |
| Just Borrowing Them |
|---|
|
Just Borrowing Them Whilst our research is progressing at an acceptable rate, I can't help but wonder how much better we'd be doing if our team wasn't handicapped by the 1990s computer equipment we are currently stuck with. Slow processing speeds are definitely scuppering our progress. Therefore I'd like to try and obtain some newer machines as soon as possible. I've marked the locations of several computer stores, manufacturers and suppliers on your map. Search these areas and bring back as many working, modern laptops as you can. Cash Reward:The value in brackets is the reward for Gold Members. $24,500 ($49,000) |
| Map [[File:{{{Map}}}|center|650px]] |
| Walkthrough Head to the designated mission area and begin looting the yellow Vans. Aggro can stack on the player quickly so melee or pistols / rifles are important. Looting the exterior streets and leaving when aggro appears is an option for those without a quieter build. You need to loot 10 Laptops, so make sure you have the space. |
| Chemical Imbalance |
|---|
|
Chemical Imbalance There are several chemical compounds that we often require during our research. Unfortunately supplies of many of these are beginning to run dangerously low, to the point where we may soon have to put our research on hold altogether. This is not something I'd like to do if we can avoid it, so we're going to need to find a new supply. I've marked several locations on your map where these compounds might be sourced. Go there and bring back as many of the chemicals as possible. Cash Reward:The value in brackets is the reward for Gold Members. $27,750 ($55,500) |
| Map [[File:{{{Map}}}|center|650px]] |
| Walkthrough You need to loot 10 "Chemicals" from yellow utility vans near the South East End Zone. Aggro can stack on the player quickly so quieter builds will do well here. Leaving the area and re-entering will rid the player of all unwanted aggro and make previously empty vans loot able again. |
| Disarmed |
|---|
|
Disarmed Quick, there isn't much time. One of our guards just got both his arms ripped clean off by one of those beasts during the last attack. The other guards tried recover the missing limbs but the infected took them and ran north. If we can retrieve them fast, I may be able to reattach them and save his arms. I've marked the location on your map, get there and retrieve O'Conell's missing limbs. But be quick! Cash Reward:The value in brackets is the reward for Gold Members. $21,000 ($42,000) |
| Map [[File:{{{Map}}}|center|650px]] |
| Walkthrough N/A |
| Mutate Away |
|---|
|
Mutate Away A new mutation has recently appeared in the infected population. It's appearence is similar to the existing "Long Arm" mutation, but in addition it's skin carries a slight green glow, and produces highly acid projectile vomit which is uses to attack it's prey. I find this amalgamation of genetic traits to be utterly fascinating and in addition I believe studying this new form may provide more answers in the battle against the N4 virus. I've marked a location where you can find these infected. Please extract as many blood samples as is feasible. Cash Reward:The value in brackets is the reward for Gold Members. $23,500 ($57,000) |
| Map [[File:{{{Map}}}|center|650px]] |
| Walkthrough N/A |
Missions in 2D
Missions are tasks that players can attempt to complete, for various rewards such as exp and money. Released on July 13, 2009. Only players with Gold Membership could participate in missions initially, so that they could test it out and find bugs. It was released to all players on July, 21 2009.
The Notice Board in the outposts provides a full list of currently available missions for you, based on your level. The monetary and experience rewards also vary, depending on your current level. Higher-leveled players would be given tough missions, but with a larger money reward and experience gain than a lower-leveled character.
Currently, the mission system is "very basic", with its difficulty and the locations of the mission objective depending purely on the player's level. AdminPwn has stated that he would introduce more complicated missions in the near future.
- Capture Missions, where players are asked to capture (barricade to make it an outpost) certain buildings in the city.
- Courier Missions, where players are tasked with delivering packages to certain locations.
- Extermination Missions, where players are required to kill an amount of the infected in an area.
- Find Missions, where players have to find lost personal items.
- Missing Person Missions, where players have to find lost people in the Inner City. Clues as to where their locations are will be given.
- Research Missions, where players are requested to collect infected blood samples and items for research by our scientists.
| Capture Missions |
|---|
|
One of the ways to earn your keep in Nastya's Outpost is to "volunteer" for reclamation duty-traveling into the city and fortifying a building in anticipation of future habitation. Sometimes it's just to clear the way for large scavenging parties, other times it might be constructing a forward outpost for an attack deeper into enemy territory. It also does not hurt to take out a few dozen infected and deny them a hiding place for awhile, either. In Capture Missions you have to barricade the designated building. You need a claw hammer and enough nails and planks for the entrance of the building and for each of the big windows on the main floor. You will also have to clear the building of all zombies. Once barricaded and cleared, you must enter outpost mode by pressing 'O' in the building to complete the mission. Things to know
|
| Courier Missions |
|---|
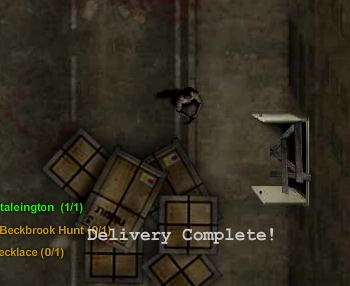 A barricaded entrance, not made by other players, indicates the site for deposition of packages. For those hunkering down in the toughest parts of the city, far away from the relative safety of the outpost, supply and equipment deliveries are often sporadic...at best. Even if the roads were not blocked with wreckage and the infected, mass transportation is non-existent. The only way to move anything is to enlist the help of lone survivors-for a modest fee, even the least combat capable of survivors will run the gauntlet to deliver whatever you might need, be it medicine, ammunition, intelligence or food.  A Pre-Barricaded building for courier missions The objective for Courier Missions is to bring some packages with you to a given place. The packages take up space in your inventory or storage until delivered. The entrance of the building where you have to deliver the packages will be barricaded. The delivery mission will be completed when you approach that entrance. Like most missions, the target area where your destination neighborhood is will be highlighted on the map, but you will need to find the exact location of the building on your own. Packages can be scrapped for $25. However, the mission will be failed and players cannot attempt it again. This, however, is a valid method for making money without having to go into the Inner City. Though it is not recommended except for extremely low level players (ie levels 1 - 3) as even the somewhat low level players will gain more money (and experience) by actually going on suicide runs into the city. Things to know
|
| Extermination Missions |
|---|
|
It has been noted that the infected tend to “flock” together, in mass migrations, moving at seemingly random directions to what point none can guess-when these flocks hit the outpost, it will usually result in a bloody attack. The more intelligent survivors realized that these migrations can be detected, tracked and worn down through repeated skirmishes, perhaps even resulting in the dissipation of the swarm-survivors are well paid to hit these groups of infected at specific choke points in the city, forcing them, hopefully, away from populated areas. An extermination mission requires a player to kill a certain number of zombies in a certain area (the location and the number depends on things like your level, but there may also be others). The location is stated at the bottom of your screen during in-game and highlighted when you look on the map. Note after starting the mission the number of zombies you have to kill will be displayed as a counter, starting like something similar to this: 0/199. This counter will update every time you kill a zombie in the requested area only. After achieving the target number of kills (and the zombies in immediate view), the mission area becomes virtually deserted. This includes both the streets and buildings, which makes the area ideal for looting. However, once the player returns to Nastya's Holdout or makes an outpost of his/her own and automatically turns in the completed mission, the area will be repopulated with zombies once again, after the player returns back into the Inner City. This is something to note before one decides to make the hike back to the Outpost or make an outpost. It is possible to clear the neighborhood of zombies before you have completed your mission, and it may or may not require a large number of kills, depending on the aggro generated by the weapons used. Once the zombies are cleared from the neighborhood, they will not return until after some time, or if the player draws aggro from other neighborhoods. While clearing a street does get rid of zombies, it is only temporary and zombies may appear once again sooner or later, unlike exterminating zombies, which gets rid of them until you enter an outpost. Players may accept two or more extermination missions in the same neighborhood, but the kill count may be erratic as kill counts hop over from one meter to the other. Things to know
|
| Find Missions |
|---|
|
Everybody lost something when Fairview fell. Most lost everything-family, friends and possessions. Some people, unwilling or unable to head into the city themselves, will pay greatly for entrepreneurial survivors to retrieve just a tiny bit of what they lost. Often it’s a small, inconsequential item, which holds no real value except to the person who lost it. While this is hardly charity work, you can probably feel good about yourself for doing it…if you come back alive that is. Find missions are obviously dubbed for finding lost, precious items in the city, often a jewelry item such as a wristwatch or a pendant. You can find the missing items in the street highlighted gold in your map/street briefed by your mission. It is possible that the missing item is in a building or sometimes on Irradiated, lootable (green) Zombies.. Missing items DO take up inventory space. It is advisable that you do this in a low aggro server, as finding the jewelry is like finding a needle in a haystack. Things to know
|
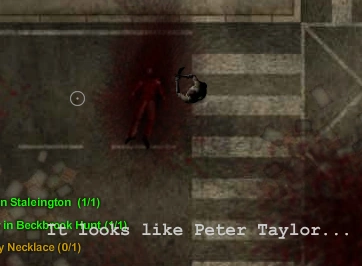

| Research Missions |
|---|
|
The Eggheads who started this whole mess are most likely the only ones who can get us out of it. They tend to be a secretive lot, working night and day in cramped labs, though a few actually take a more active role. Of course, to do the work, they need test samples...'Recently, Infected Blood, containing valuable recombinant DNA, seem to be the hottest item-Scientists can produce powerful antibiotics to the various strains of disease from them, as well as predict and track the evolution of the infected. Survivors are paid top dollar to collect these samples from specific infected types. Research missions require players to kill zombies for their blood samples. Approximately every 1 in 10 of the target zombies will leave behind a lootable blood residue after it is killed. The first zombies you kill will be a 1 in 1.3 chance. After you collect the blood sample, the chance returns to 1 in 10. Also, lootable zombies' corpses will take up a looting "flag" - another lootable object in the street or area will no longer be lootable, even though the player hasn't looted it. If all objects in the street or area have been looted and a zombie provides a searchable corpse, it will not be lootable. It is possible to find the blood samples from corpses in the streets. Note: You can't loot in Bathrooms. There are glitches. Blood samples can be scrapped for money, and yield the following values:
You are not allowed to accept more than one mission for a single blood type (e.g. Advanced Mutant Blood Sample). Apparently, it is set that way to avoid mission progress errors similar to those of Extermination Missions in a same neighborhood. If you have already accepted one research mission, other similar ones won't be displayed in the Notice Board. They will appear when you cancel your ongoing research mission.
To collect a blood sample, simply hold "F" over the corpse or if you killed it with a critical hit, the blood residue to collect it. Green zombies are no exception, however you will have to loot the piece of equipment they are carrying first before you can loot their blood sample (if they have one to loot). Each blood sample takes up one inventory slot. Below is a list of what certain zombies are referred to as. Zombies "Infected" - Regular gray zombies
"Charred" - Purple zombies
"Crow" - Crow Zombies
"Mutant" - Red/Fat Red zombies
"Advanced mutant" - Red Long Arm zombies
"Irradiated Infected" - Green zombies
Z"Irradiated Charred" - Green Muscle zombies
"Irradiated Mutant" - Green Fat zombies
"Irradiated Advanced Mutant" - Green Long Arm zombies
"Behemoth" - The Behemoth
|


